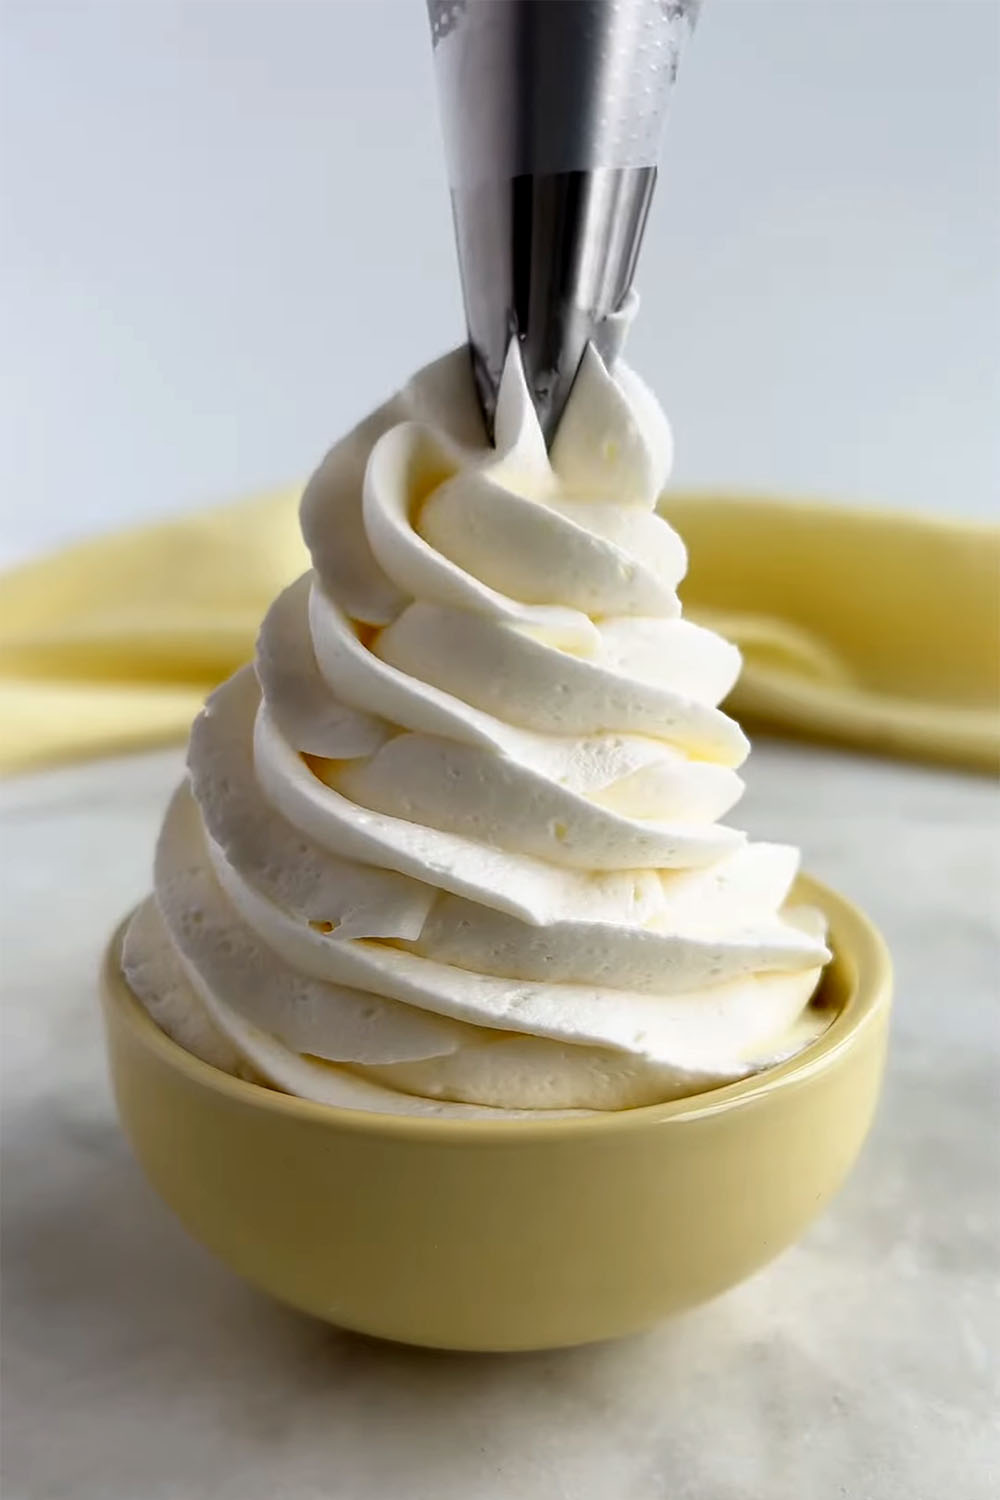
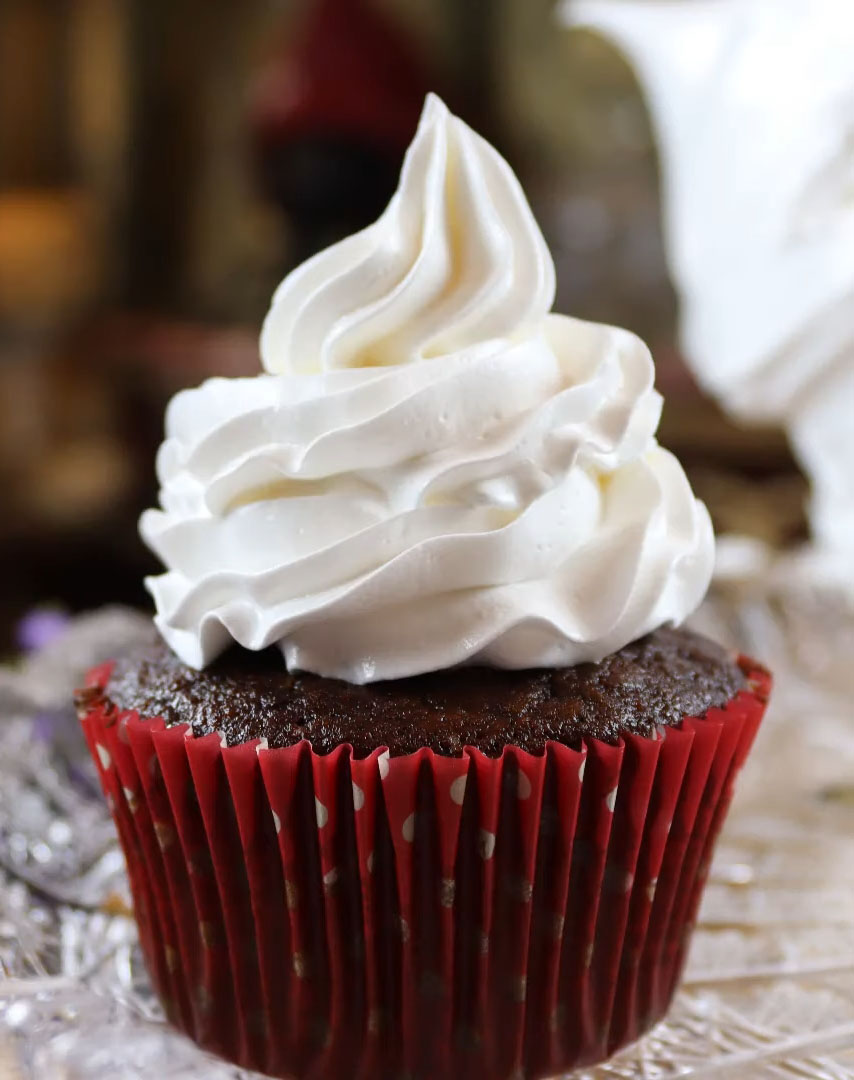
This easy ermine frosting recipe is a traditional favorite for dressing up a classic red velvet cake, but its versatility goes far beyond that.
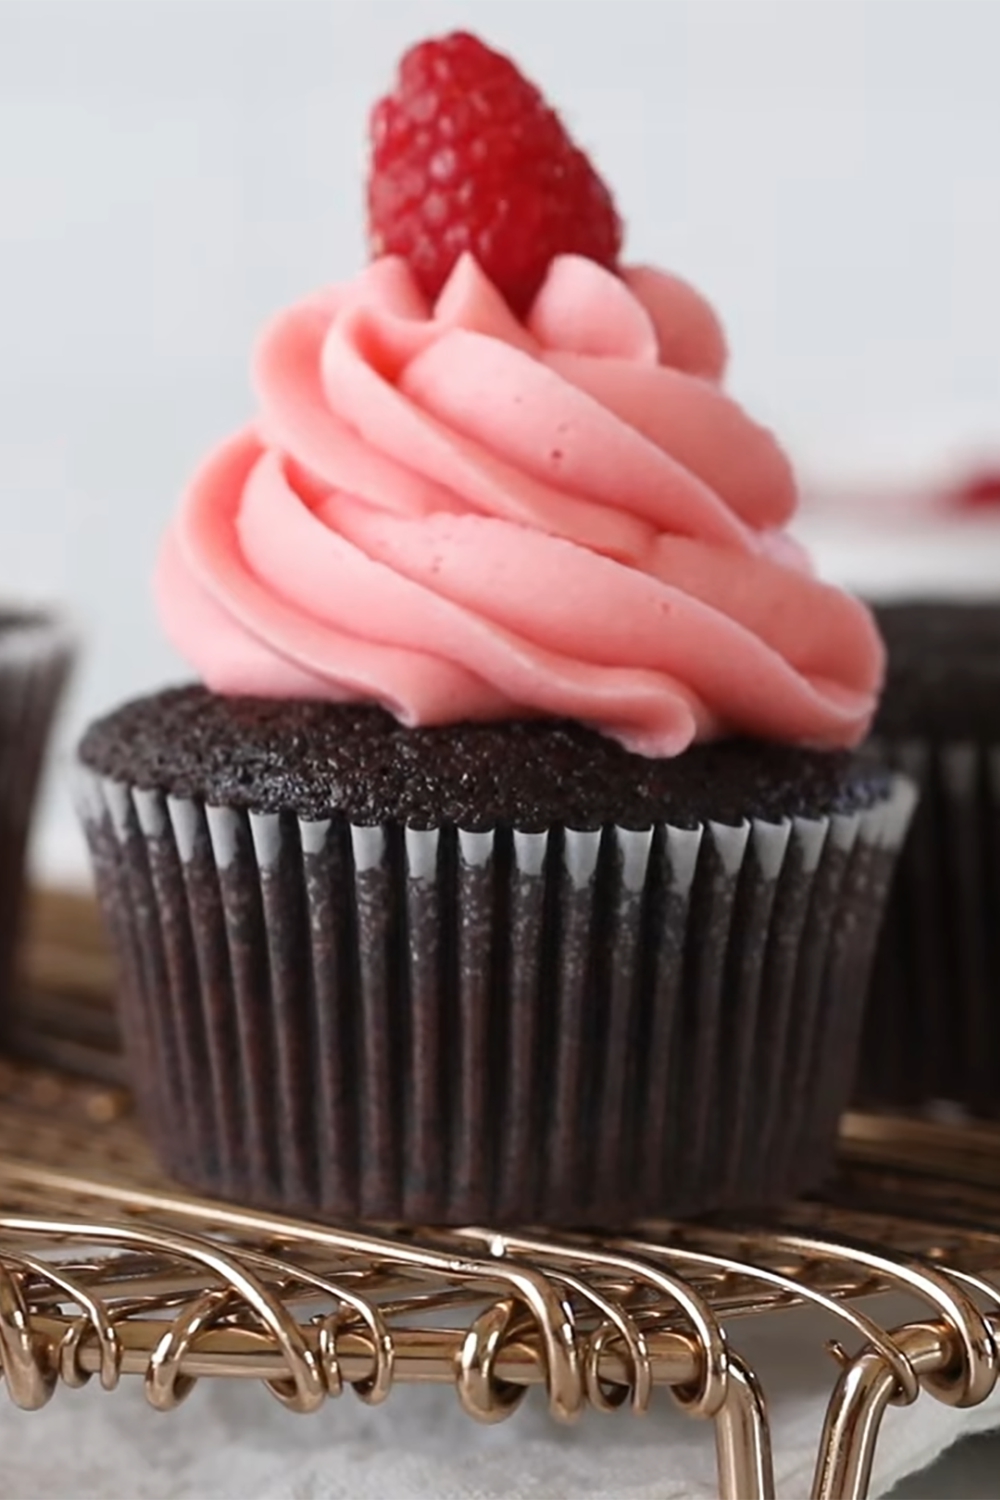
I still remember the first time I used this frosting. It was for my niece’s birthday cake – a rich chocolate affair. The contrast between the bold chocolate and the creamy, subtle frosting was a hit. Since then, I’ve used it to complement everything from zesty strawberry cakes to classic vanilla.
Now, let me walk you through how to make this delightful frosting.
What is Ermine Frosting, and What is So Special About It?
This starch-thickened, milk-based recipe is also known by other names like flour frosting or boiled milk frosting. Simply put, it’s made with cooked milk and flour base. This combination creates a silky texture that’s just perfect for spreading on your favorite cakes.
It may remind you a bit of German buttercream in flavor and technique. However, it’s made with everyday granulated sugar and without eggs instead. This is also not your quick-fix American buttercream because it sidesteps the powdered sugar route.
All the special twists above set ermine frosting apart as a unique, irreplaceable recipe.
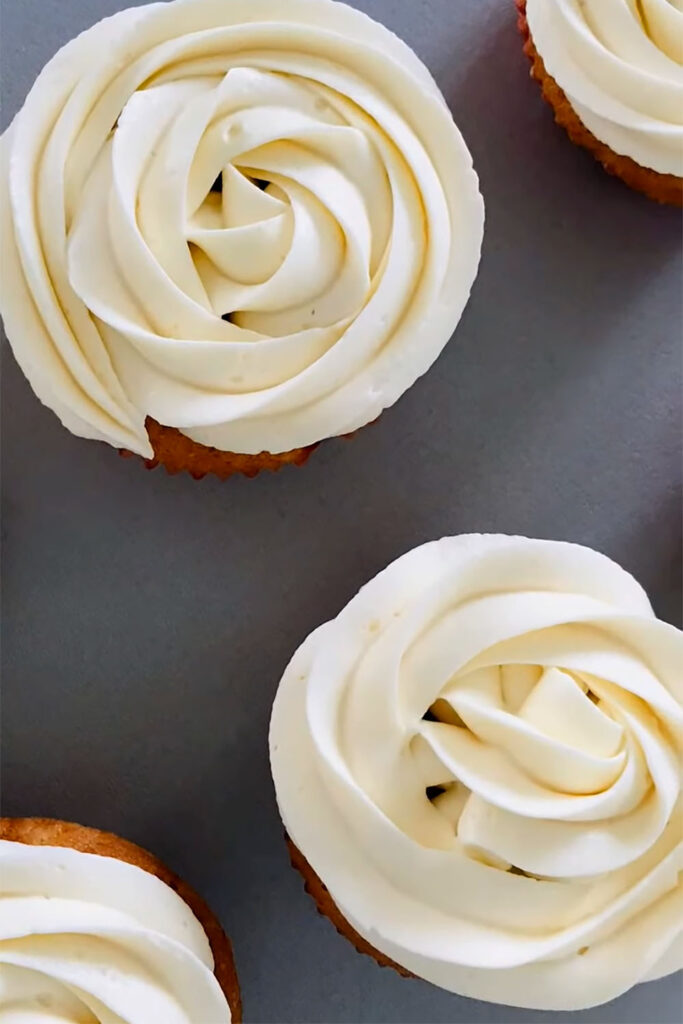
- Balanced flavor and texture: It’s not as dense as a German buttercream nor as airy as a Swiss meringue. It sits beautifully in the middle with a creamy, smooth consistency that’s just divine.
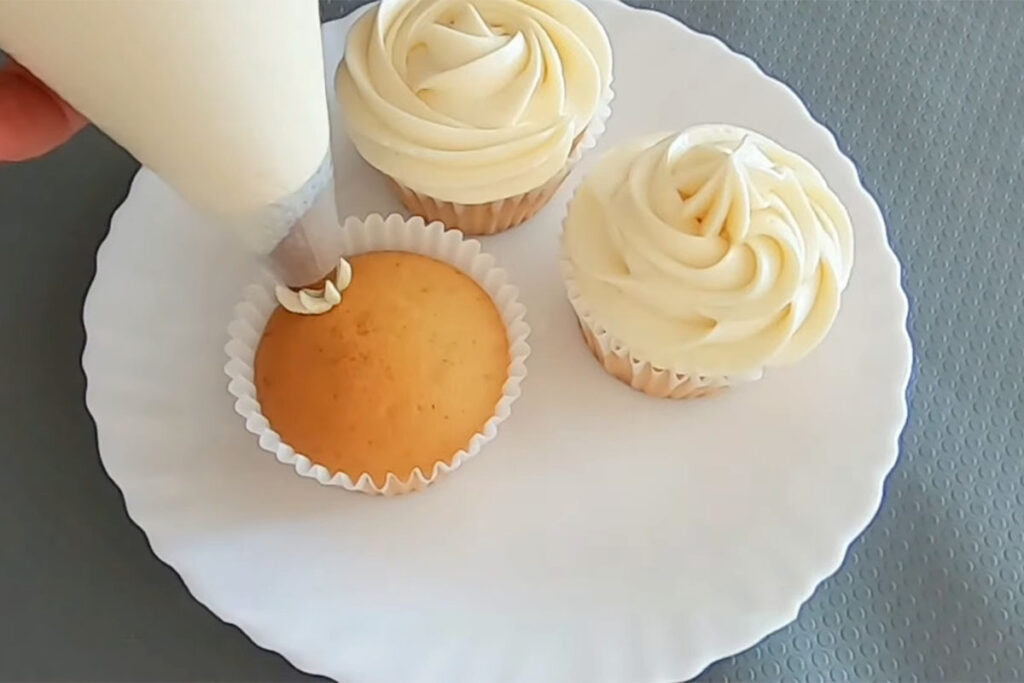
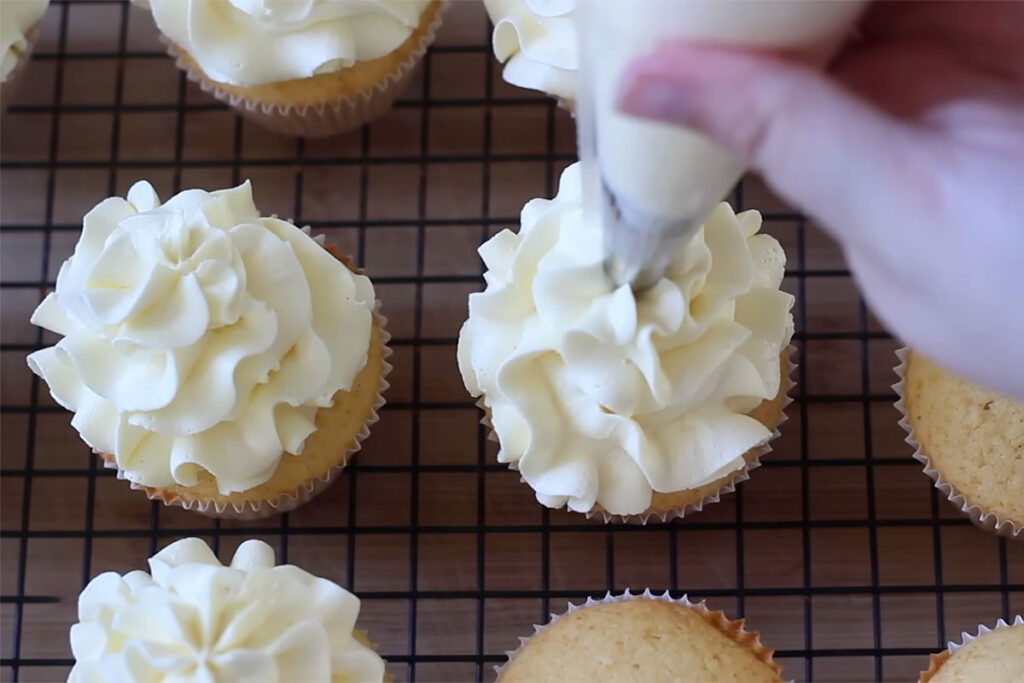
- Great for decorating: It’s thickened with flour, which might sound unusual, but trust me, it works wonders. This technique creates a frosting that’s silky and stable – great for spreading and piping.
- Low in sugar: It contains less sugar than most other frosting. This means it brings out the natural flavors of your cake without overpowering it with sweetness.
- No eggs needed: If you’re not a fan of the custardy taste or yolky color that comes with some buttercream, ermine frosting is the way to go. It has the fresh and pure taste of butterfat and fresh milk, reminiscent of whipped cream, but with the stability of a traditional frosting.
- Snowy white look: It whips up into the prettiest, brightest white. For events where I want an elegant, understated look, nothing beats ermine frosting.
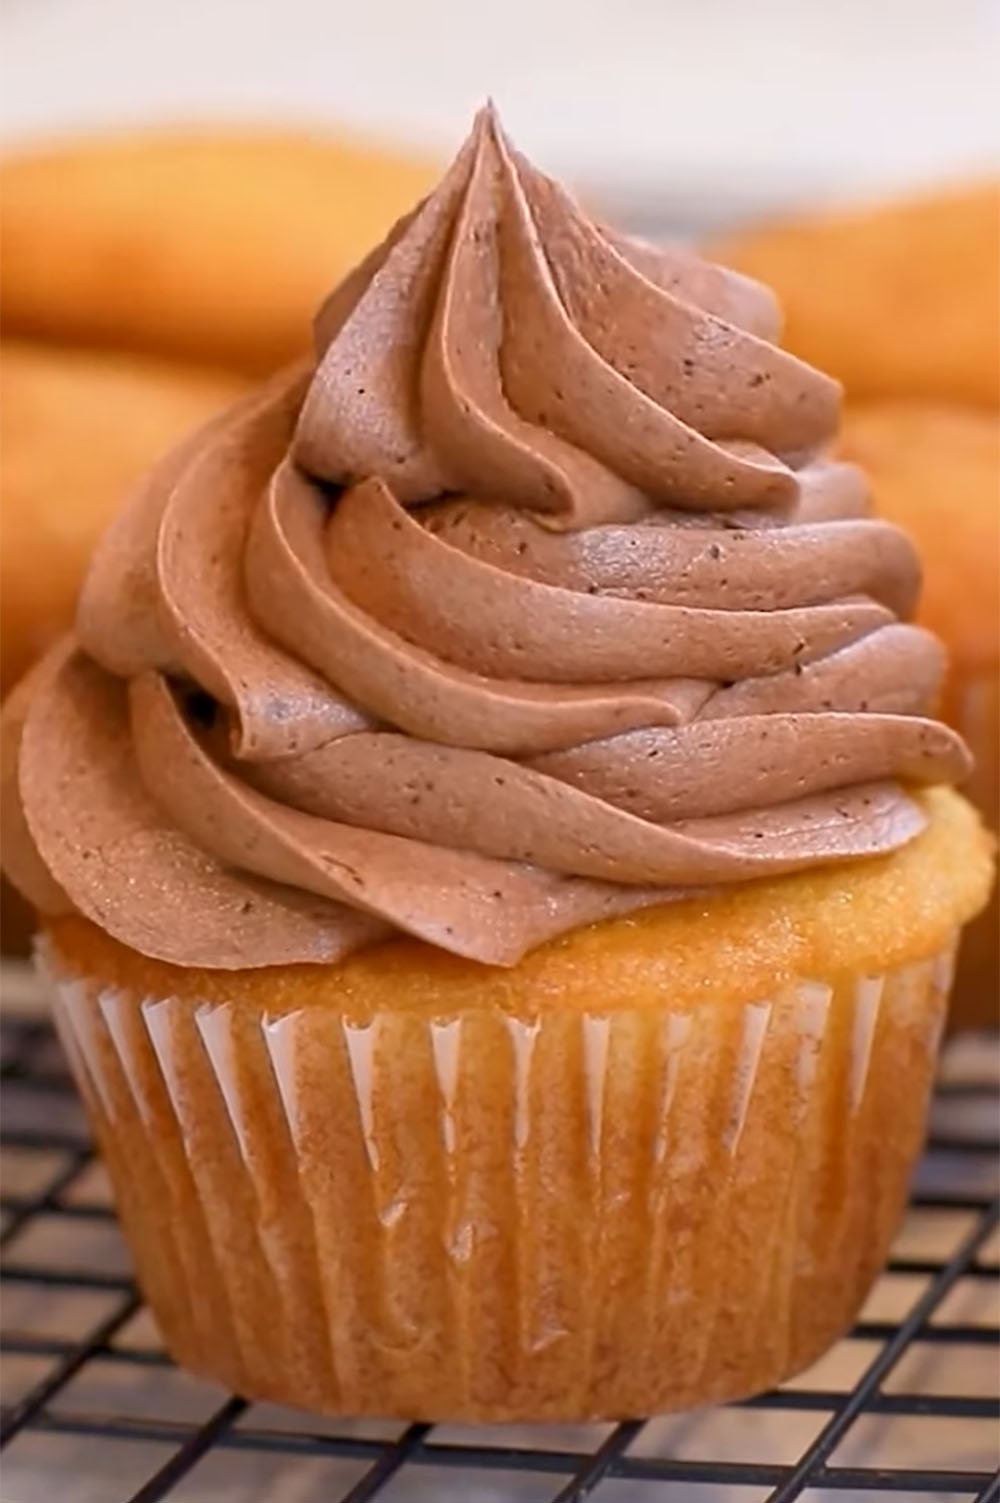
- Versatile: It pairs beautifully with a wide range of cakes and cupcakes, especially on classic vanilla or rich chocolate cakes. Ermine frosting fits the bill, whether it’s offsetting the deep, malty flavor of Guinness chocolate cupcakes or adding a fun, zesty twist to ice cream cone cupcakes. It’s also the base for variants like chocolate ermine frosting.
How to Make Ermine Frosting
Ingredients you’ll need:
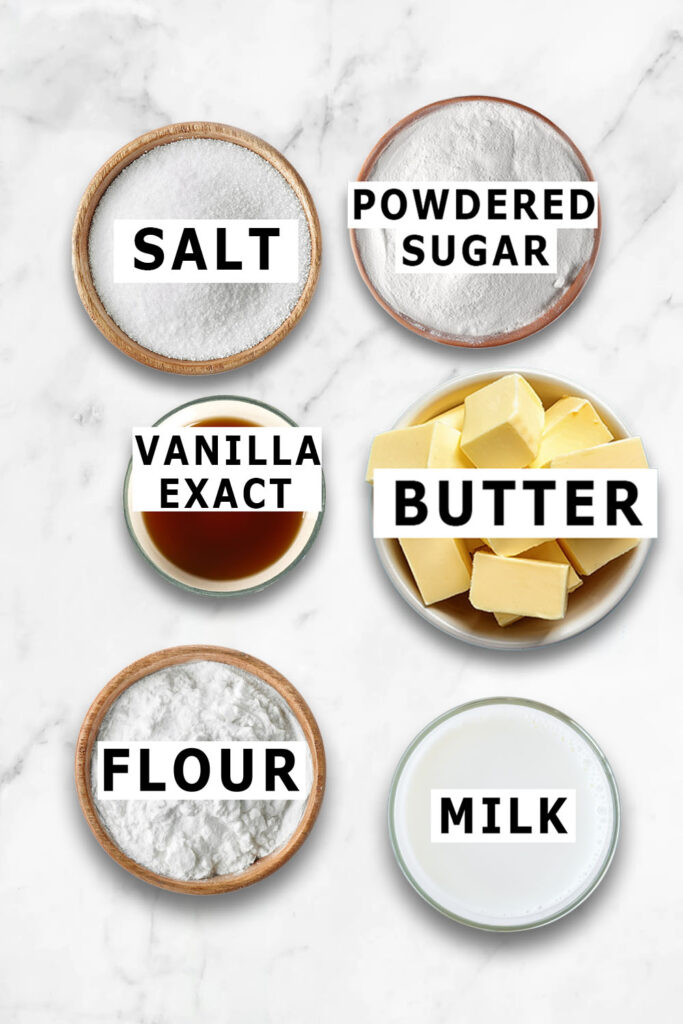
- All-purpose flour (1 ½ ounces): It’s the base of our roux, giving the frosting its unique texture.
- Milk (9 ounces – just over 1 cup): Any fat percentage will do, but I find whole milk gives a richer taste.
- Sugar (~ 5 ounces): Either plain or toasted. The choice here can subtly influence the frosting’s flavor profile.
- Salt (3/8 heaping teaspoon of kosher salt): If you’re using table salt, halve this amount.
- Unsalted butter (9 ounces, softened to about 65°F) The key to smooth frosting is butter that’s pliable but not overly soft.
- Vanilla extract (3/8 ounce–about 2 ¼ teaspoons): It adds that classic flavor.
Here is how you can create a lusciously smooth ermine frosting:
Create the Paste
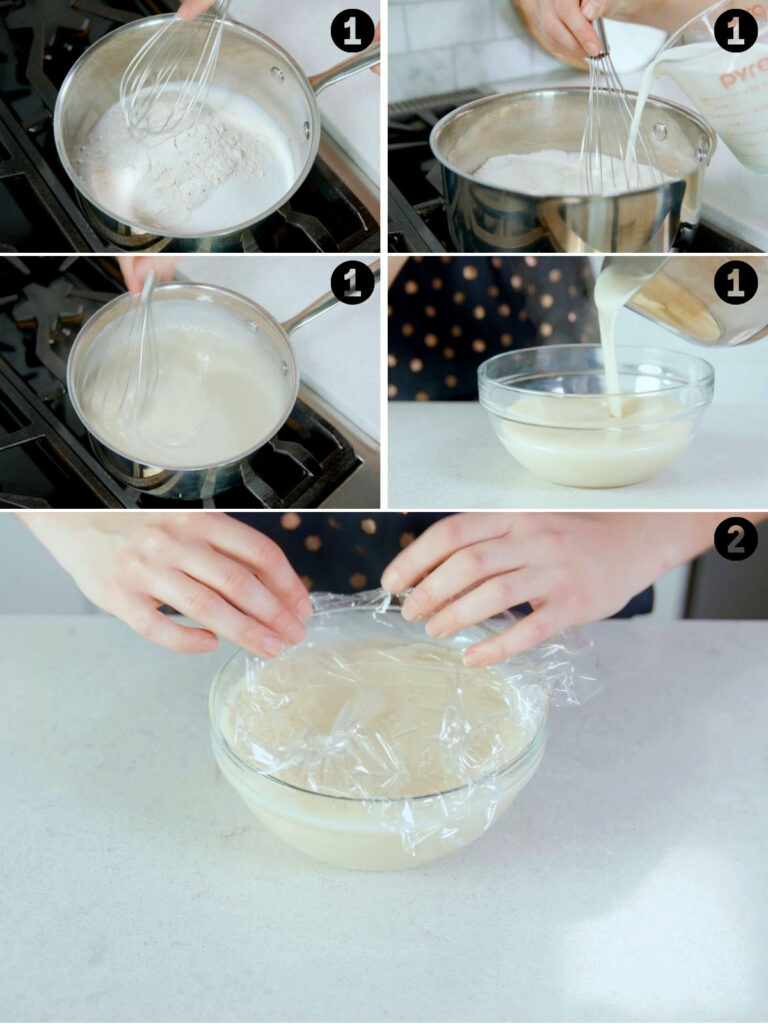
Start by combining the all-purpose flour with milk in a saucepan. Whisk them together until you’ve got a lump-free mixture. This is the foundation of your frosting, so you want to make sure it’s smooth from the get-go.
Now, heat this flour mixture over medium heat, stirring constantly. You’re looking for a thick consistency similar to that of a well-cooked roux. Keep an eye on it. You don’t want any floury taste left, which means it needs to be cooked thoroughly.
Dissolve the Sugar
Once your mixture has thickened, remove the saucepan from the heat. Stir in the sugar. This might seem like it’s thinning your mixture but don’t worry. The heat will dissolve the sugar completely and remove all the gritty texture from your final frosting.
Cool the Mixture
Allow the paste to cool until it reaches roughly 70°F. If it’s too warm when you add it to the butter, it could ruin the consistency of your frosting.
Prepare the Butter
Meanwhile, your butter should be getting ready. Your unsalted butter should be pliable yet cool, ideally near 65°F. It should be pliable but not too squishy. This texture is important for the frosting to come together properly.
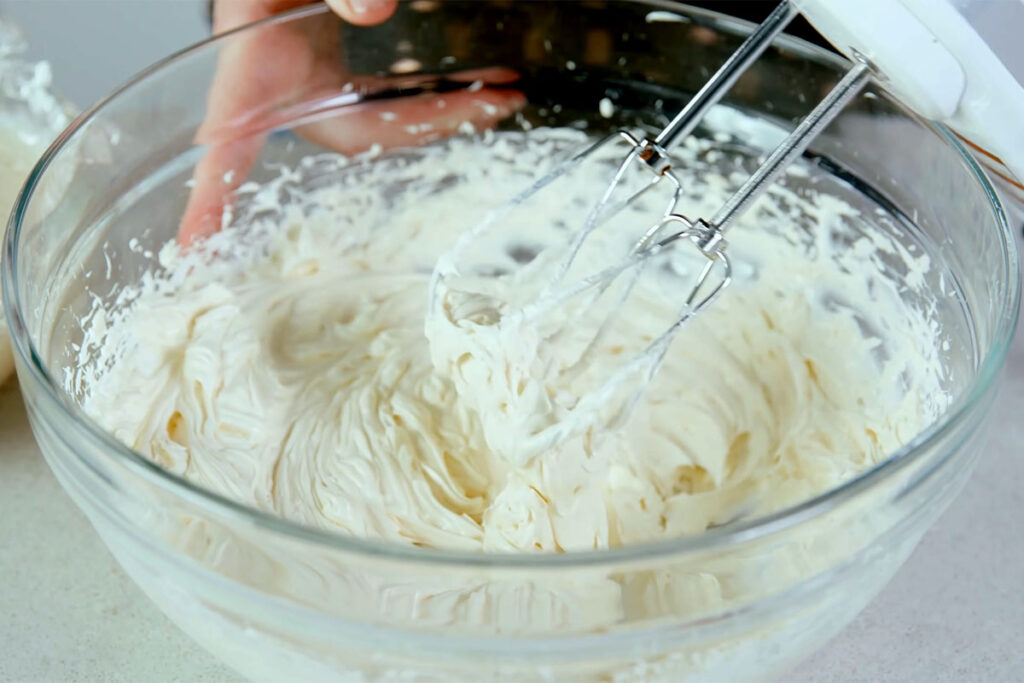
Now, take your stand mixer and beat the butter with the paddle attachment. You’re aiming for a creamy, light, and somewhat fluffy texture. This usually takes no longer than five minutes. The right texture here is vital for the frosting’s final consistency.
Combine the Ingredients
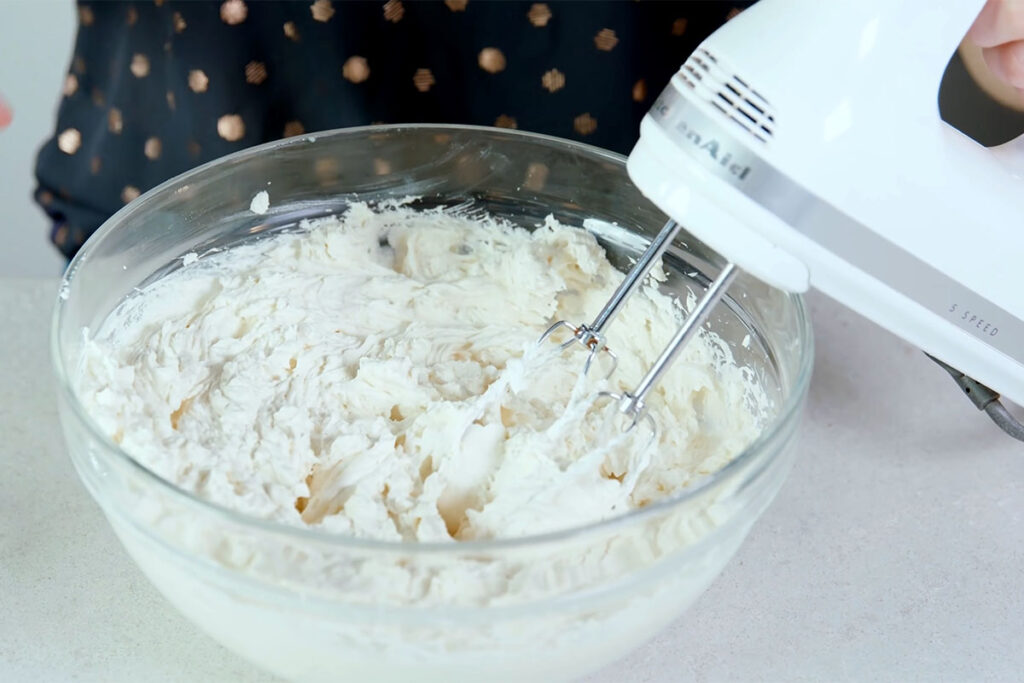
Bit by bit, add the cooled flour mixture to your creamed butter while continuing to beat everything together. Make sure to pause occasionally to scrape down the sides of the bowl. This gradual mixing is essential for a smooth, even consistency.
The Final Whip
Once all ingredients are combined and the mixture looks smooth, switch over to the whisk attachment of your mixer. Whip the frosting until it becomes light and airy on medium-high speed. This final whipping introduces air into the frosting, giving it that dreamy, light texture that ermine frosting is famous for.
Homemade Frosting Tips
Special Equipment
To make your frosting-making experience smoother, a few key tools can help.
A 3-quart saucier or a 10-inch skillet is great for cooking the roux, while a balloon whisk will help you get a smooth mixture. A stand mixer is essential for that light, airy texture, and a flexible spatula will make sure you get every bit of frosting out of the bowl.
Texture Adjustment
If your ermine icing batch seems too dense or greasy, pop it in the microwave and re-whip it. That extra heat will improve the texture. But if it’s too loose and drippy, chill it before whipping again to firm things up.
Seasoning and Flavoring
Once you’ve nailed the texture, feel free to season the frosting to your taste. A little extra salt can really enhance the flavors. And don’t forget about your vanilla extract, which also adds a lovely aroma. If you’re feeling adventurous, try other extracts to switch up the flavor profile.
Storage
Scoop it into a heavy-duty sealed bag or an airtight container, and it’ll keep in the fridge for a week. A freezer can even extend this period to several months.
Just remember to bring it back to around 70°F and give it some whipping before using. This way, the texture stays just as perfect as when you first made it. To prevent the freezer smells, I often use two or more layers of plastic wrap.
Frequently Asked Questions
Can You Pipe Flowers with Ermine Frosting?
Yes, ermine frosting pipes very well and is commonly used to decorate cakes. Its smooth texture makes it ideal for piping delicate details.
How to Fix Ermine Frosting That’s Too Runny?
If your ermine frosting is too runny, chill it in the refrigerator for a bit. Once it’s firmer, whip it to the desired consistency.
Can I Add Flavors Other Than Vanilla to Ermine Frosting?
Absolutely. Feel free to experiment with different extracts or flavors like almond, lemon, or even coffee to give the frosting a unique twist.
Can I Make This Frosting Dairy-Free?
Yes, you can substitute the milk with a plant-based alternative. I’ve had success with almond and coconut milk.
Can Ermine Frosting Be Made in Advance for Large Batches?
Yes. Just remember to store it in the refrigerator or freezer and whip it before use.
I hope you’ll give this ermine frosting a try soon – it just may become your new go-to!
More Unique Frosting Recipes:


Ermine Frosting
Equipment
- 10-inch skillet (or 3-quart saucier)
- Balloon whisk
- Stand mixer
- Flexible spatula
Ingredients
- 3/2 oz all-purpose flour
- 9 oz milk, any fat percentage
- ~5 oz sugar plain or toasted
- 3/8 heaping tsp kosher salt (halve if using table salt)
- 9 oz softened unsalted butter
- 3/8 oz vanilla extract
Instructions
- In a saucepan, whisk the milk and flour together until smooth. Bring this mixture to a boil and stir constantly until it turns into a thick, roux-like paste.
- Remove the saucepan from the heat and stir in the sugar to dissolve it. Let the mixture cool to about 70°F.
- Leave the butter out on the counter or use short bursts in the microwave to make it soft and pliable but still cool.
- Use the paddle attachment of a mixer to beat the butter until it’s creamy, light, and holds its shape.
- Gradually add and beat the cooled milk paste to the butter. Once everything is combined and smooth, whip with the mixer until the frosting is airy and light.
Notes
- Adjust Texture: If frosting is too dense or greasy, warm slightly and re-whip. If it is too soft, chill and then re-whip.
- Season to Taste: Add extra salt or vanilla extract for flavor enhancement.
- Storage: Store in a zip-top bag in the fridge for one week or freeze for several months. Thaw and whip it again before use.