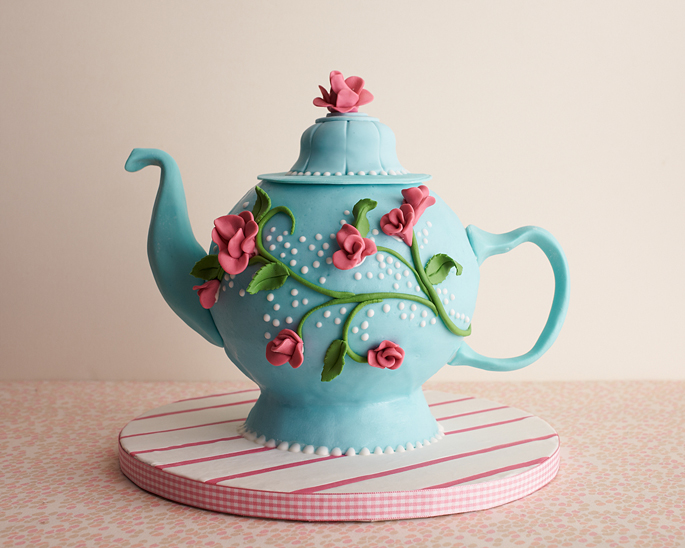
Impress your guests with this 3-D tea pot cake made using a ball shaped baking pan. Step-by-step instructions make this project doable and a perfect dessert for your next tea party.
In This Articles:
PREPARATION
YOU WILL NEED
- 1 Cake Recipe Baked In A Ball Pan, Frozen Just Until Firm
- (1) 4″ Round x 1″ Thick Styrofoam
- (1) 3″ Round Cardboard Circle
SUPPLIES
- PME White Rolled Fondant Icing – 8 oz
- Half Ball Pan
- Gum Paste Mix – 1lb Bag
- 3/4 oz Sky Blue Gel Paste Food Coloring
- 3/4 oz Yellow Gel Paste Food Coloring
- 3/4 oz Leaf Green Gel Paste Food Coloring
- 3/4 oz Deep Pink Gel Paste Food Coloring
- 5 Petal Cutter – Set of 4
- 6″ Rd Cake Boards – Set of 5
- 12″ Round Silver Drum – Set of 2
YOU MIGHT ALSO NEED
- PME Sugar Craft Knife
- Fat Daddio’s Silicone Fondant Mat 24″ x 36″
- Fat Daddio’s 14″ Non-Stick Rolling Pin
TWO DAYS AHEAD:
STEP 1: TINT FONDANT AND GUMPASTE
Start by tinting 1 lb. of fondant with blue paste and a touch of yellow to create a light aqua blue. Next, tint 1/4 of the gumpaste aqua to match the fondant, 1/8 dark pink, 1/8 green and leave the remaining gumpaste white. Keep everything wrapped tightly in plastic wrap and then place inside of a tightly sealed ziplock bag.
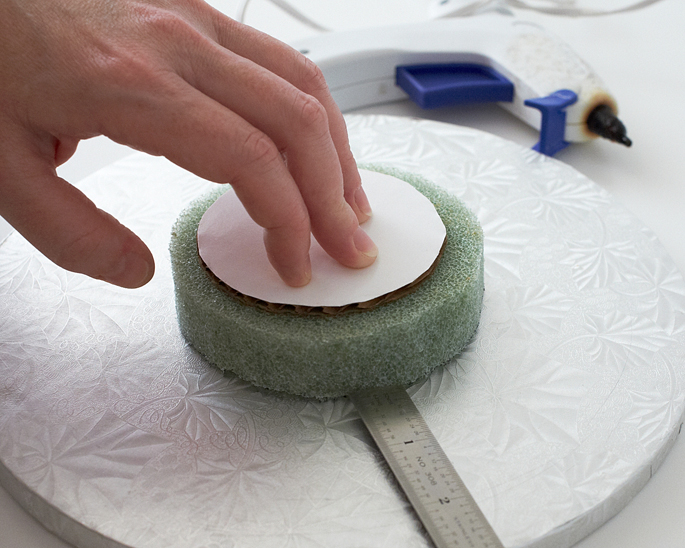
STEP 2: PREPARE BOARD
Center the styrofoam circle in the middle of the silver drum and glue into place. Then glue the 3″ round cardboard centered on top.
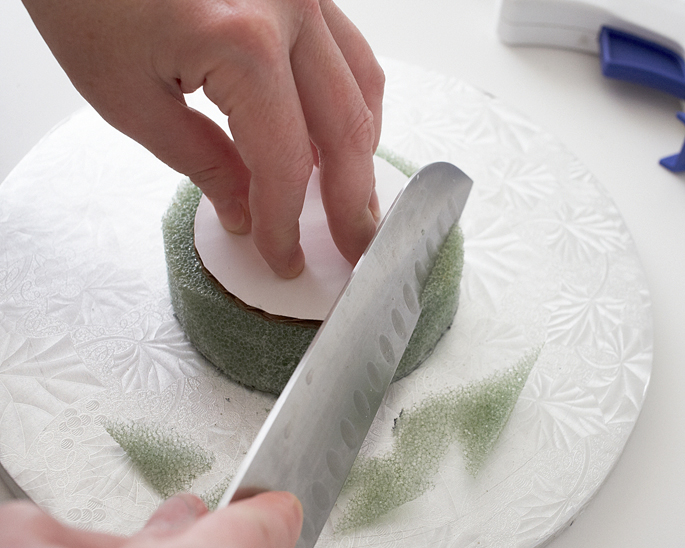
Next, create the tea pot base by using a cake knife to shave and angle the styrofoam, starting at the cardboad circle and ending at the bottom of the stryrofoam circle. Set this aside.
STEP 3: PREPARE ACCENT DECORATIONS
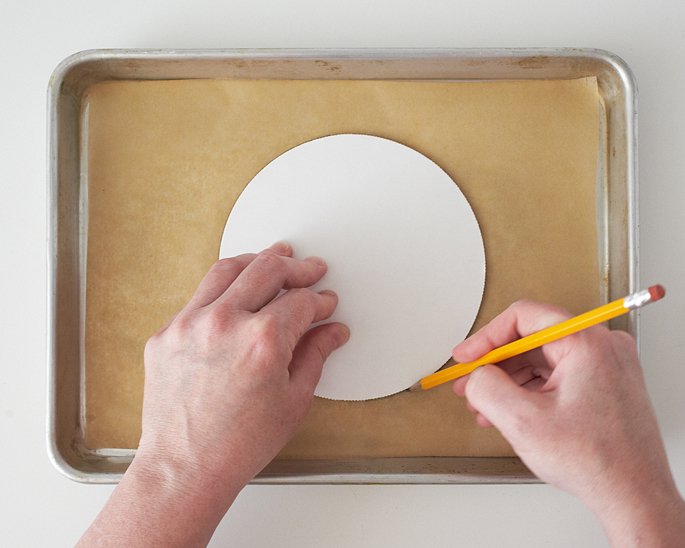
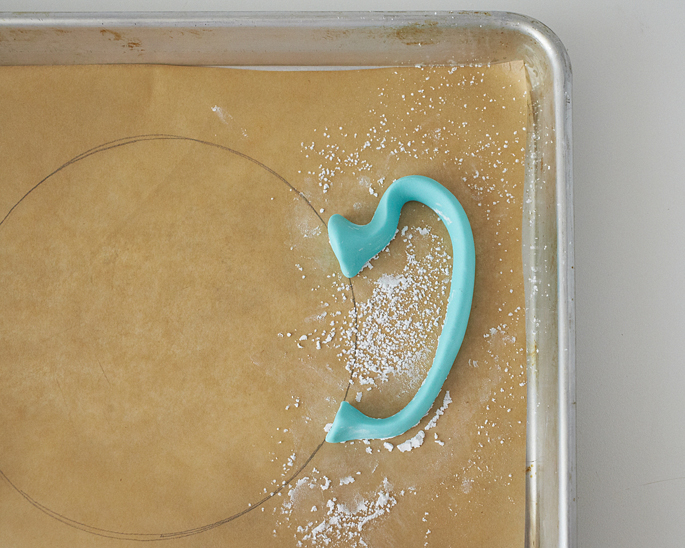
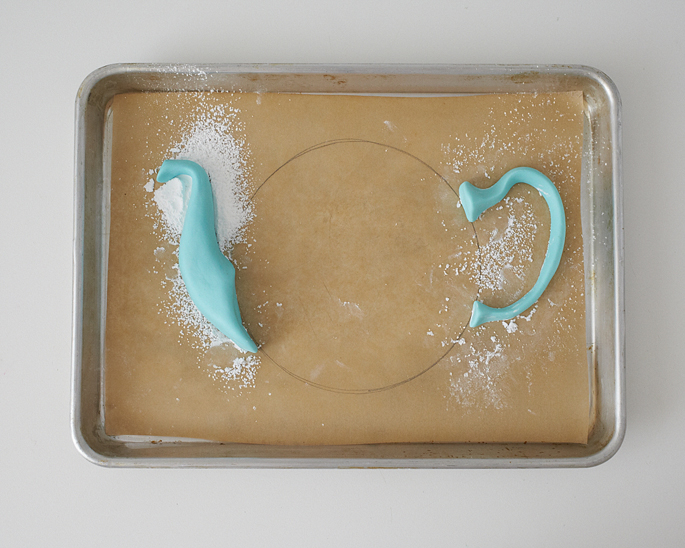
On a 1/4 sheet tray covered with parchment, trace a 6″ circle in pencil. (This will be the rough size of the iced cake, so it will give you a layout for making the spout and handle)
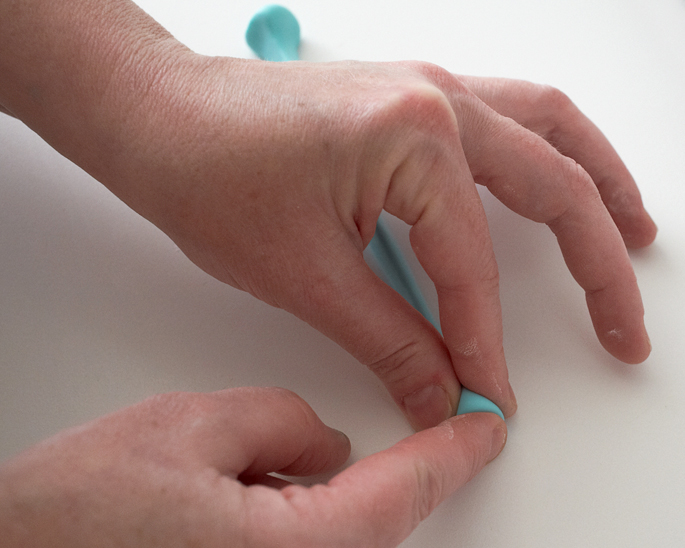
Divide the aqua gumpaste into 4 equal parts. Use 1/4 of the paste to create the handle. Start by rolling it into a thin log and then use your finger to flatten both ends.
Tap powdered sugar on the edges of the traced circle and then place the handle on the tray. Create your desired handle shape and then line the edges up with the curve of the circle. This will ensure that the handle attaches easily to the curved edge of the cake.
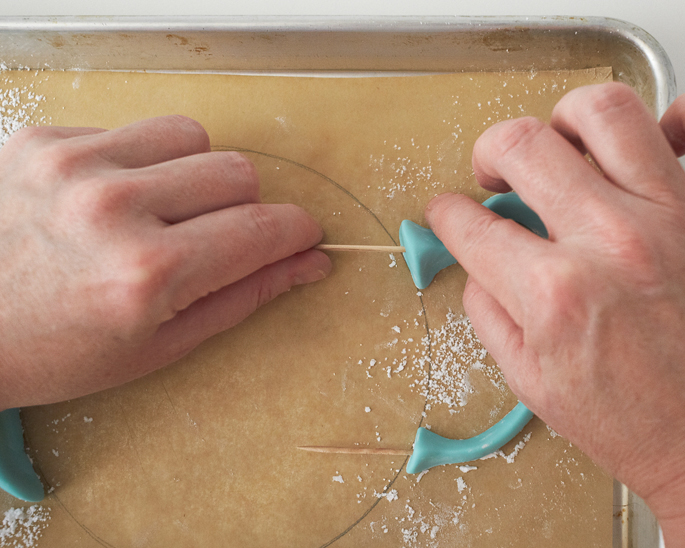
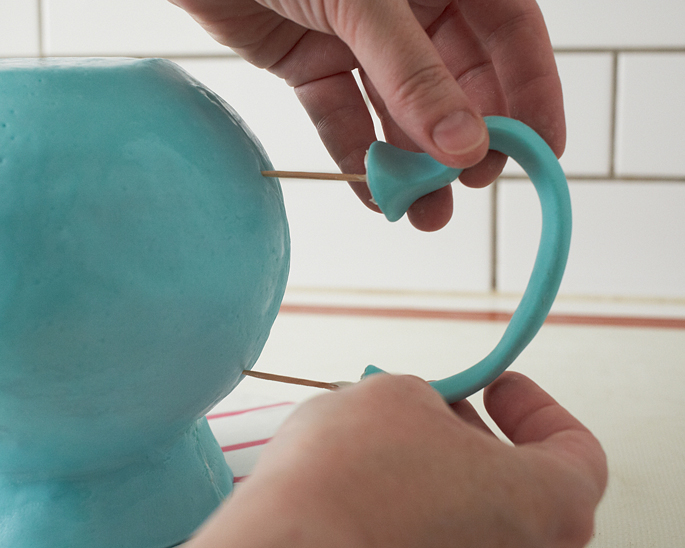
Next, dip two toothpicks in water and insert them halfway into the ends of the handle. Make sure that both toothpicks are perfectly parallel. (This will help ensure that the handle goes straight into the cake. If the toothpicks are not parallel, the handle could break.)
Next, knead 2 of the gumpaste portions together to create the spout. Start by forming a cone and then taper the cone and flatten it on both ends.
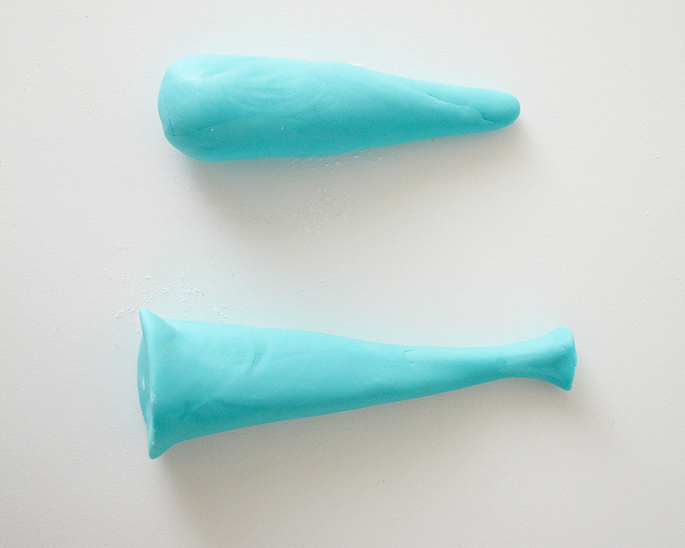
Curve the gumpaste to resemble a spout and then place on the other side of the traced circle to dry. Once again, make sure that the end that will be attached to the cake is curved to match the curve of the circle so that the spout matches up when attached to the cake.
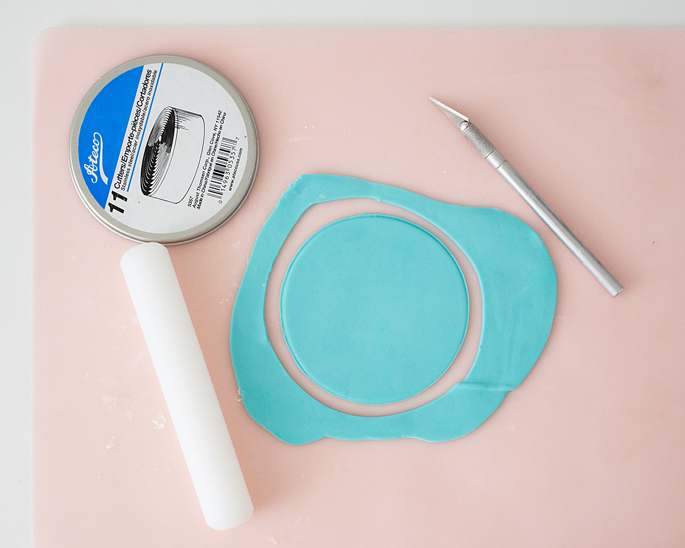
Roll the remaining portion of aqua gumpaste into a thin layer. Cut out a 3 1/2″ circle, using a craft knife and place on the tray to dry.
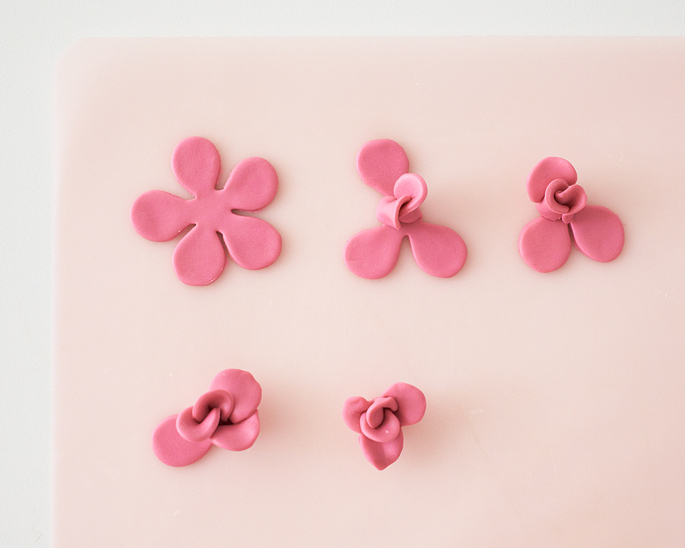
To make the simple roses: Roll some pink gumpaste very thinly on a lightly powdered surface and use the 5 petal cutter to cut out a blossom. Start by intertwining the 1st and 3rd petals to create a bud. Then wrap the 2nd petal around the bud. Repeat with the remaining petals until you have a simple bud. (You may need a dab of water to get the petals to stick if your gumpaste is dry). Create mutiple roses for the tea pot of different sizes using the various 5 petal cutters. Make one rose with more petals for the top of the pot by attaching extra petals to the outside. Set aside the entire tray to dry for the next two days.
DAY OF:
STEP 4: ICE AND COVER THE CAKE IN FONDANT
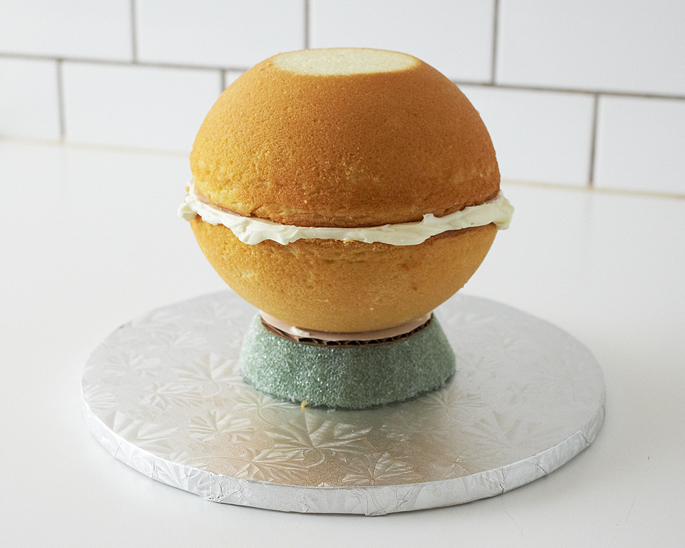
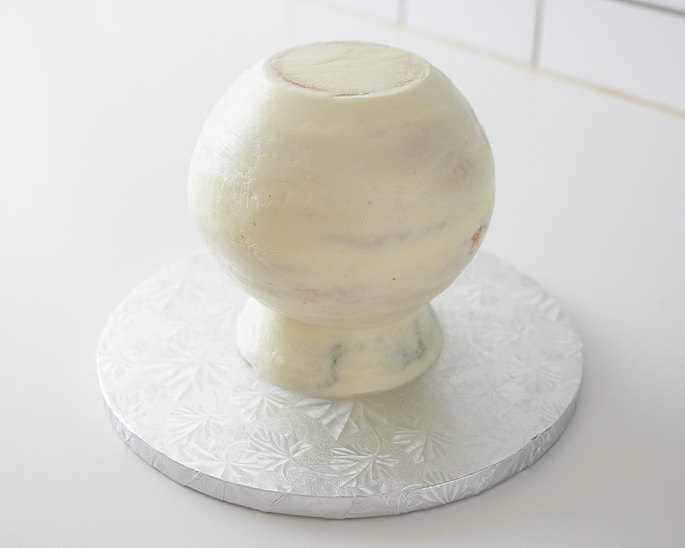
Remove the cakes from the fridge and trim the top of each ball cake to create a 2 1/2″ diameter flat spot.

Smear some icing on the stryofoam base and place 1/2 ball on top. Smear icing between and place the other 1/2 ball on top.
Ice the cake and refrigerate until the icing is firm, about 30 minutes. Remove from the fridge, and with clean hands, lightly rub the exterior of the cake to remove any bumps in the icing. This will create a smooth surface for fondant rolling. Place back in the fridge.
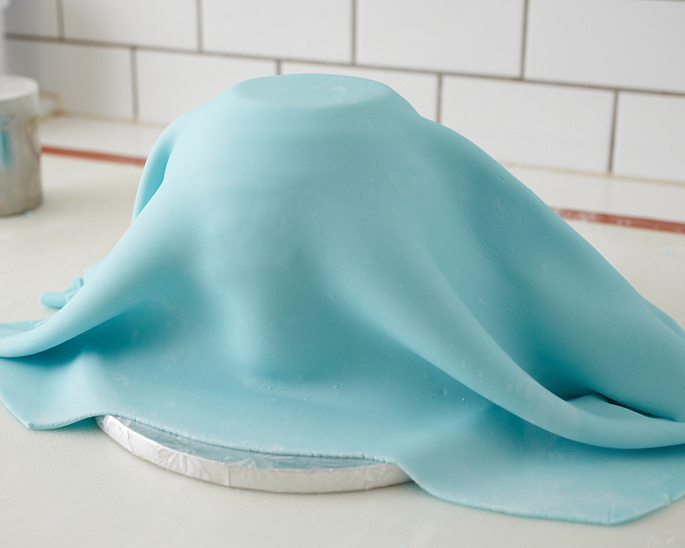
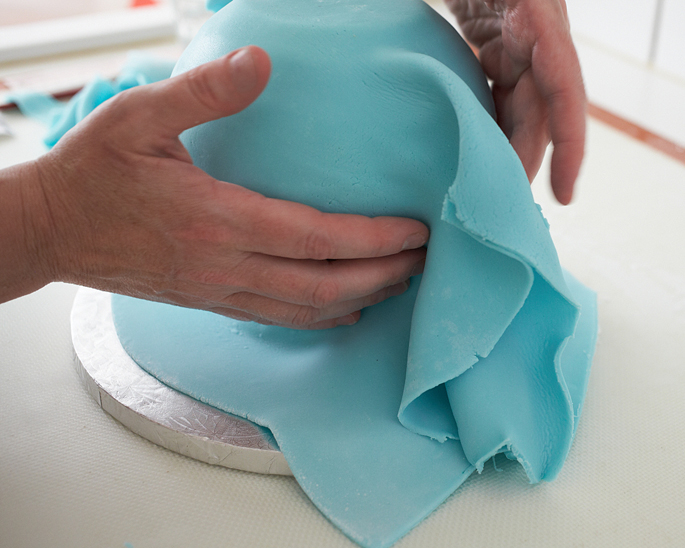
On a surface covered lightly with powdered sugar, roll the fondant 1/8″ thick. Drape over the cake and immediately gather the excess fondant on opposite sides of the cake, while simultaneously rubbing the fondant onto the ball to adhere.
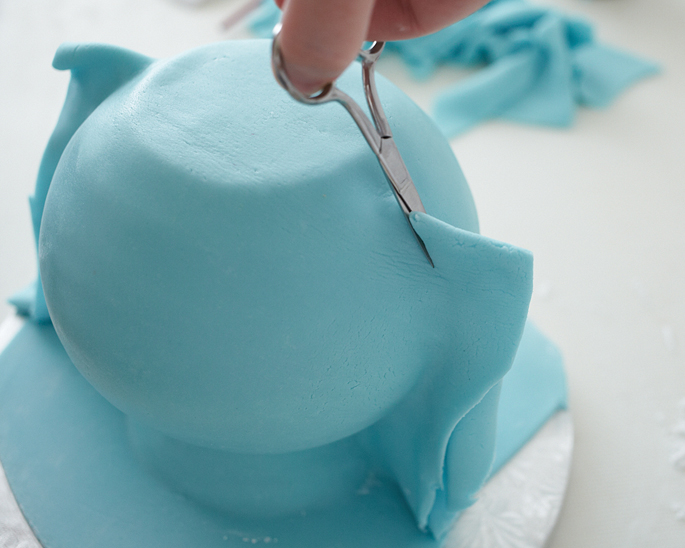
Use scissors to trim the excess fondant down to 1″ or so. Then use a paintbrush dipped in water to lightly brush the inside of the seam. Close the fondant back together and gently pinch the excess with you fingers to adhere together.
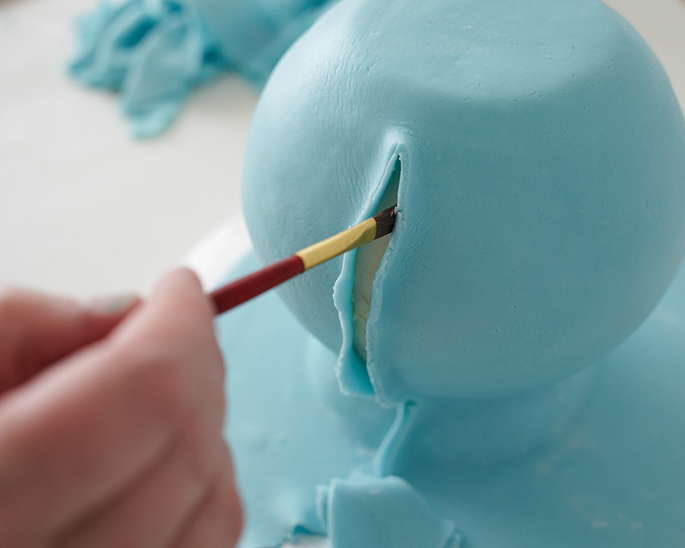
Retrim the excess closer to the edge of the cake and then smooth the seam with your finger to create a finished look.

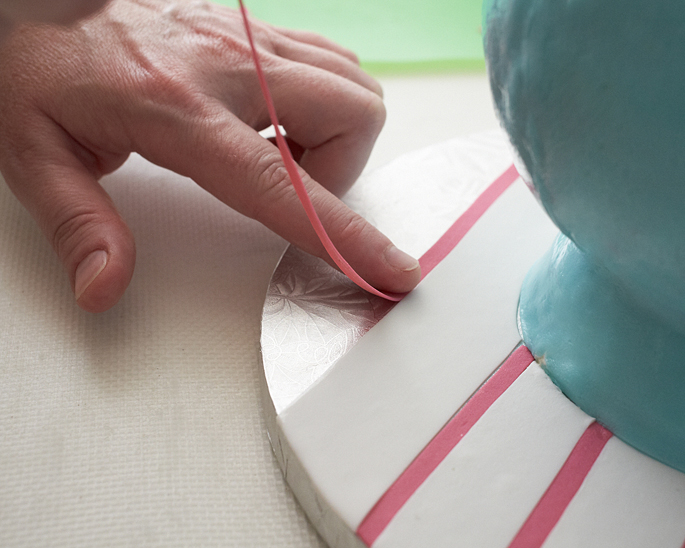
Use water to adhere strips of colored gumpaste to the board if desired. Trimming around the tea pot as necessary.
STEP 5: ADD DECORATIONS TO FINISH
To attach the spout: Lift the spout and position it against the cake to figure out what angle the skewer should go in at, in order to both pierce the styrofoam and also hold the spout in place. Trim the skewer if necessary and then tap the skewer through the cake and into the styrofoam base.
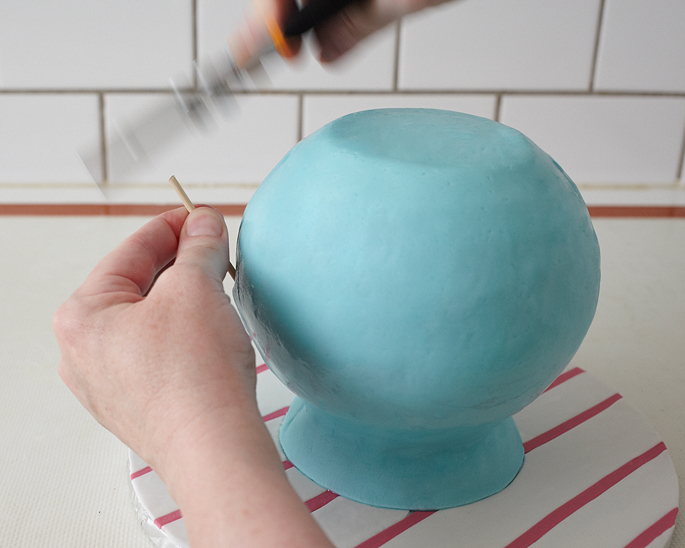
Melt a handful of candy coating discs in the microwave for 30 seconds and stir until completely melted. Using a dry paintbrush, dab some melted coating on the bottom of the spout and pierce with the skewer while adhering to the edge of the cake. Hold in place for a few seconds for the coating to dry.

Repeat process with the handle.
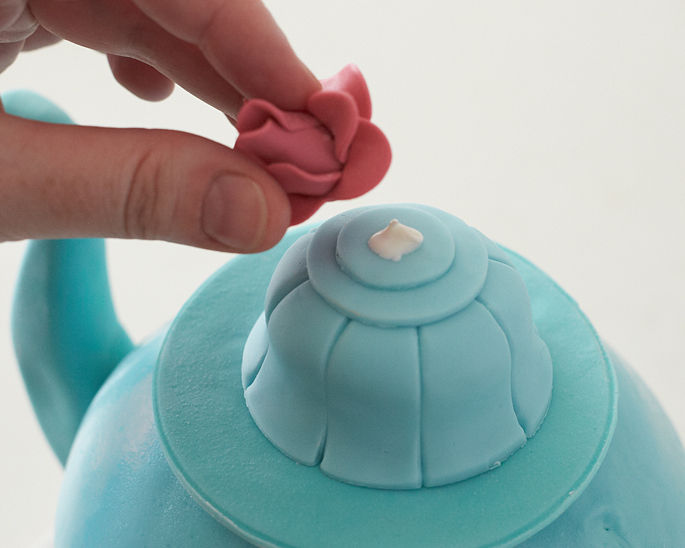
Use a little coating to adhere the aqua disc to the top of the pot. Next, use some excess aqua fondant to make a bulbous lid in whatever design you like and attach with more coating. Attach the large rose to the top to finish.
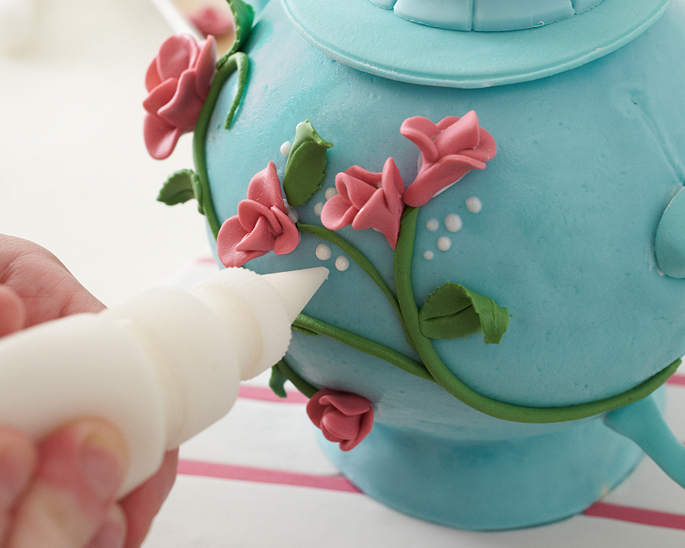
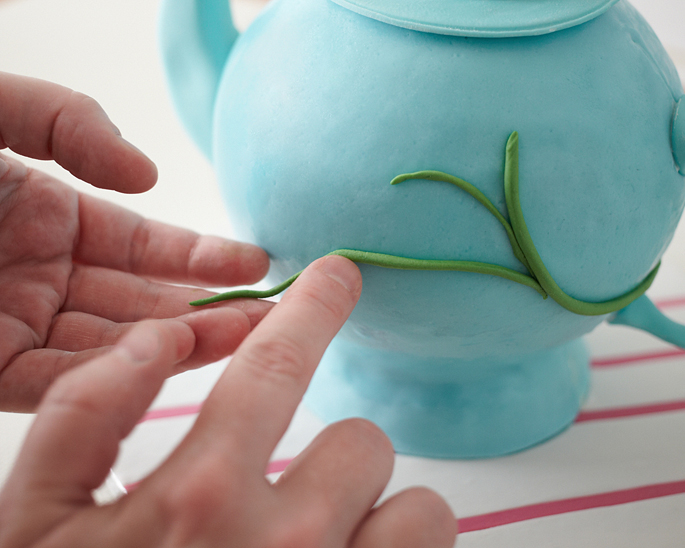
Roll green gumpaste into various thin ropes and attach them to the front of the tea pot using a very light coating of water to adhere.
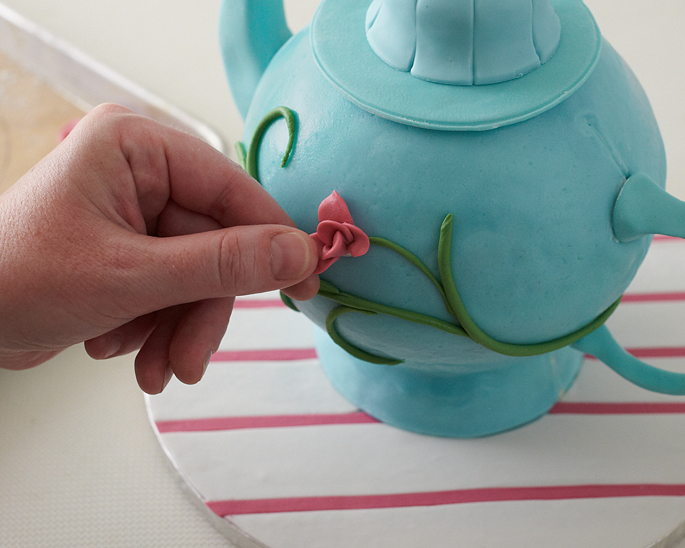
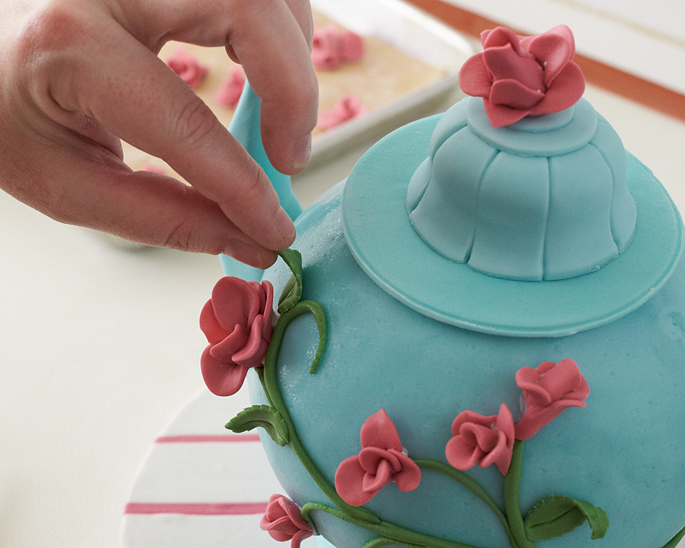
Attach roses at the end of the vines with some melted candy coating.
Roll some green gumpaste thinly and cut out leaves using the leaf cutter. Attach them using a touch of water.
Pipe royal icing dots to fill in blank space around the flowers and at the edge of the lid and the base.