Chocolate cupcakes and strawberries are gifts straight from heaven. And when put together, they bring in a huge flavor bomb we never saw coming!
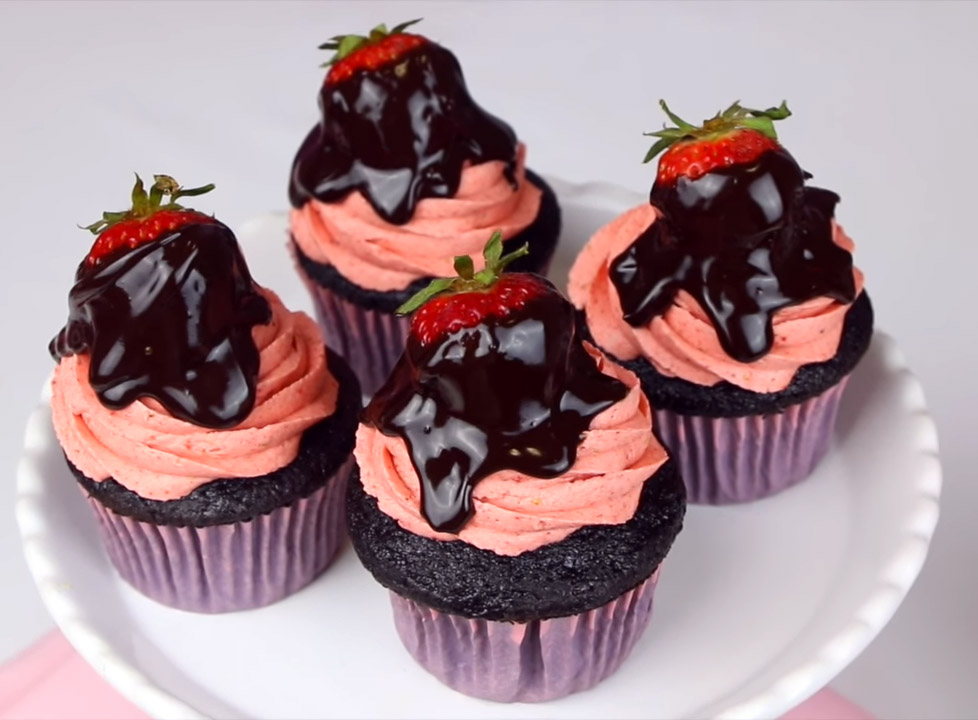
Seriously, they hit all the right spots without going overboard – a true crowd-pleaser, if you ask me. None of my customers can get enough of these chocolate-covered strawberry cupcakes!
Why We All Love Chocolate Cupcakes With Strawberry Filling
- Chocolate and strawberries just… click, like they’re always meant to be together. Chocolate is rich and decadent, while strawberries bring that sweet and slightly tangy kick. Who can resist such a perfect team?
- The cool part? You can totally tweak it to suit your taste buds! Some people like it nice and balanced, while others want the chocolate or strawberry flavor to really pop. That’s the charm of it all – everyone gets what they want!
- And can we talk about how stunning they look? I mean, that combo of rich brown and vibrant red is just eye candy. Perfect for any special occasion! You can also get all creative with the decorations – fresh strawberries, swirled jam, or maybe some playful strawberry buttercream or vanilla frosting.
- Don’t even get me started on what to pair them with! A glass of milk, chocolate milk, or even a fruity punch can be the icing on the cake, amping up the sweetness without stealing the spotlight.
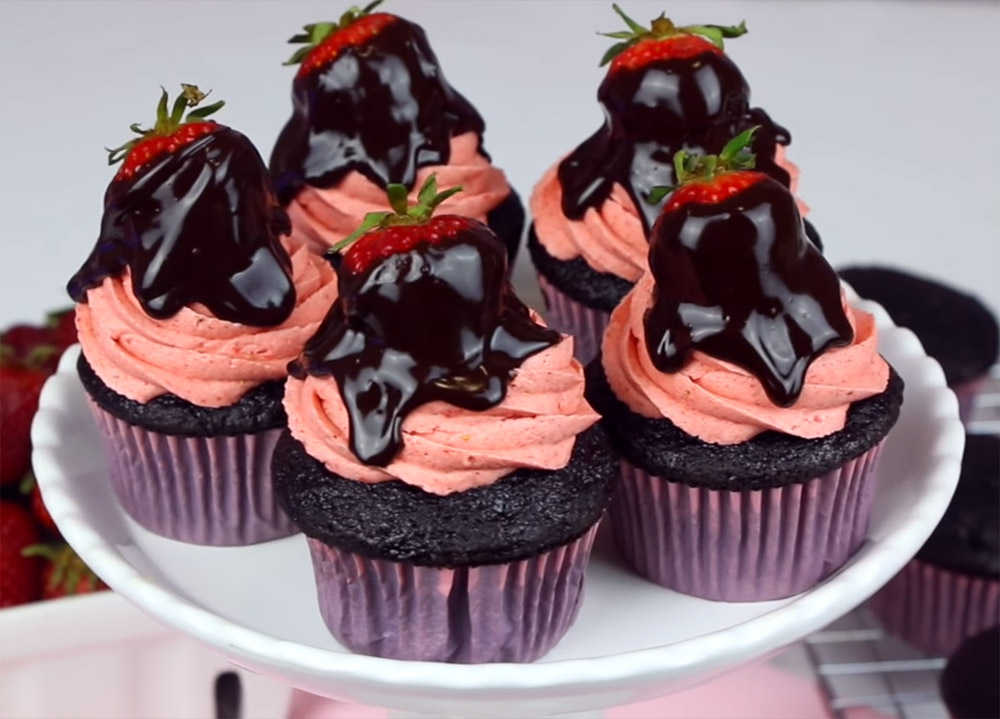
How To Make Cupcakes With Chocolate-Covered Strawberries
Chocolate Cupcakes
Prepare the ingredients
All-purpose flour: The key player! I recommend spooning and leveling the flour before dumping it into the measuring cup. Scooping the whole cup might leave you with more flour than needed!
Sugar: My recipe calls for both brown and granulated sugar, and I prefer whisking it with dry ingredients rather than wet ones.
Baking soda & baking powder: These powerful agents leave your cupcakes while creating a soft and fluffy interior with a hint of yeasty aroma.
Cocoa powder: Use the natural unsweetened type so that it won’t throw off the flavor.
Salt: A secret to making flavors pop on your tongue.
Buttermilk: This ingredient adds moisture to the cupcakes for melt-in-your-mouth bites.
Vanilla & egg: For a burst of aroma.
Oil: I use vegetable oil in my recipe for added moisture, balancing the dryness of cocoa powder.
Espresso powder: The powder will brighten the chocolate note.
Boiling water: To dissolve the espresso powder.
Here’s everything you need to make chocolate cupcakes:
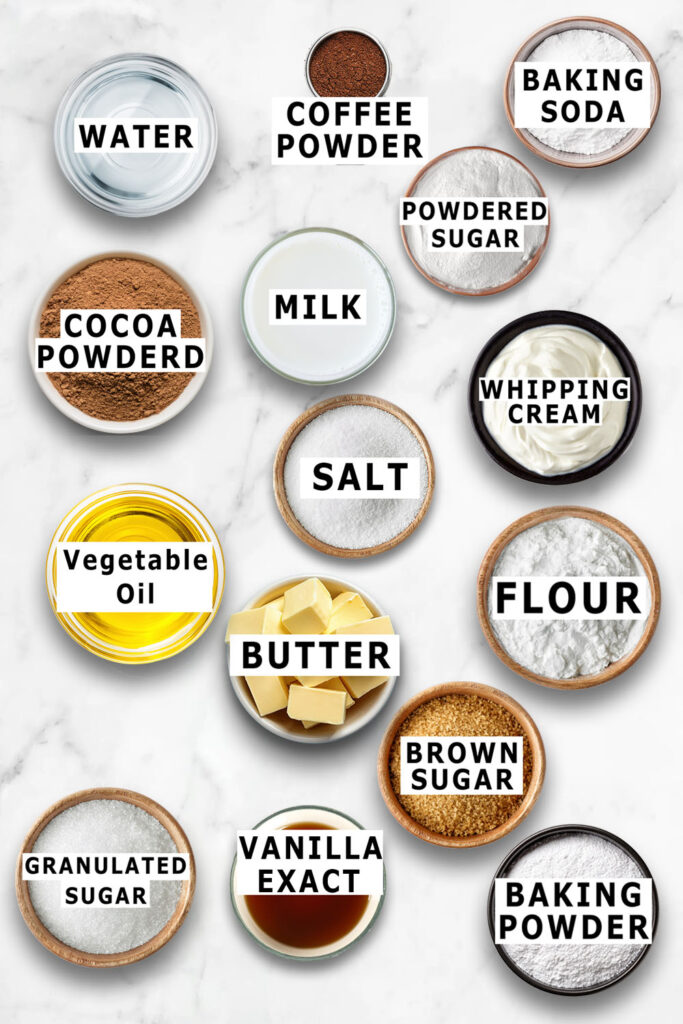
Step 1.
First things first, preheat your oven to about 350°F (or 177°C if you’re metric savvy). Grab 2 muffin pans (I use the 12-cup type, so prepare 4 pans if you use the 6-count type) and line 24 cupcake liners in total. Set those babies aside for now.
Step 2.
Now, sift together your flour, baking soda, baking powder, cocoa powder, and a pinch of salt in a big mixing bowl. Once that’s done, whisk in both the granulated and brown sugar until smooth.
Next, pour in the vanilla extract, buttermilk, egg, and oil. Give it all a good mix until it’s blended just right!
Step 3.
Time to level up! Mix your instant espresso powder into ¾ cup of boiling water until it’s all dissolved, then pour into your mixing bowl and give it another mix until everything’s combined. Don’t freak out if the batter seems a bit thin – that’s all part of the plan!
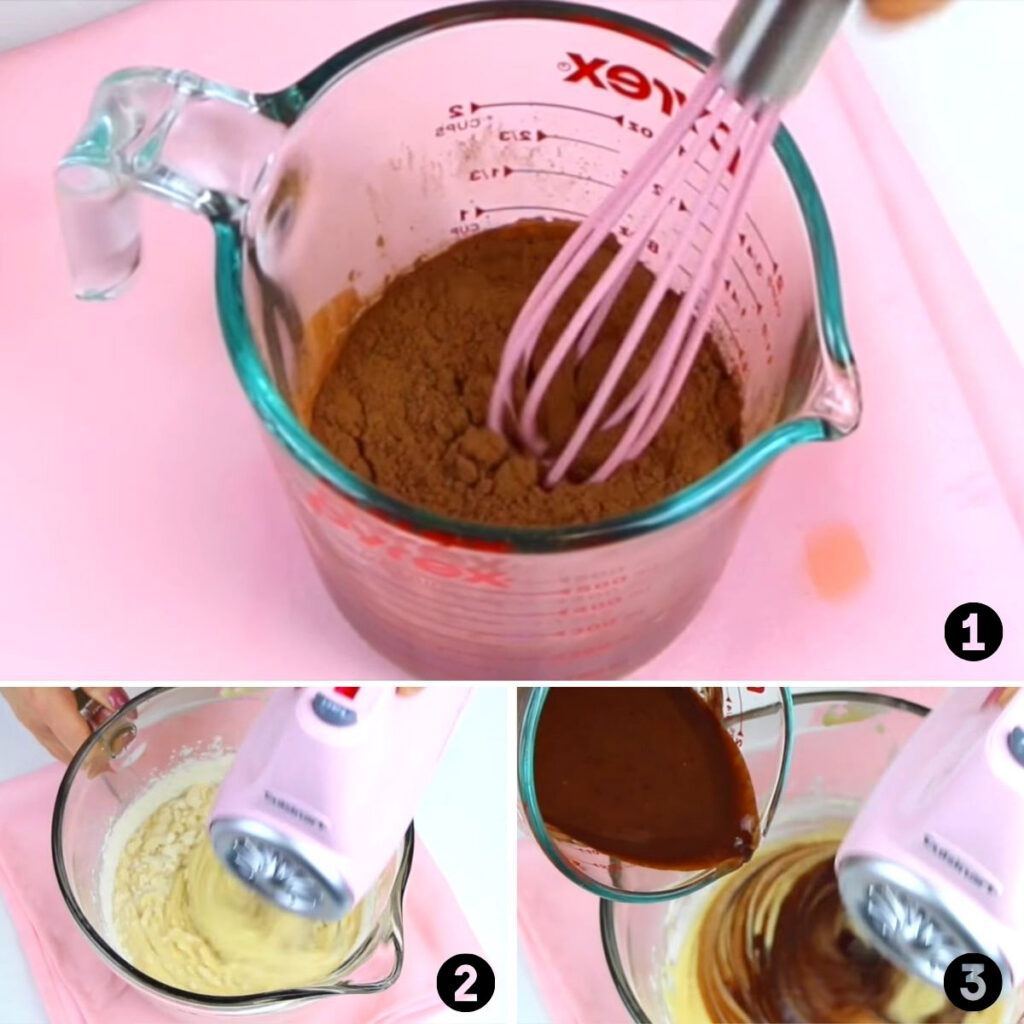
Step 4.
Now, spoon your yummy batter evenly into each of those 24 liners. Don’t go overboard – just fill them up a bit over halfway. Then, pop everything in the oven at 350°F (or 177°C) for around 16 to 18 minutes.
Keep an eye on them, and when a toothpick comes out mostly clean from the center, you’ll know they’re good to go!
Step 5.
When they’re done baking, take these little delights out of your oven and gently transfer them onto the wire rack. Let them cool off completely before you start diving in. Patience, my friend; it’s worth the wait!

Frosting
Step 1.
Grab a stand mixer with a paddle attachment (or just a good ol’ electric mixer if that’s all you’ve got).
Throw in your butter and beat it until it’s nice and smooth. Then, start adding your powdered sugar, cup by cup, and mix it up real good after each addition ‘til everything’s creamy.
Step 2.
Time to bring in your freeze-dried strawberries!
Toss these strawberries in a food processor or blender and give them a whirl until they’re all nice and powdery. Once that’s done, mix this fruity powder right into your frosting and watch the magic happen!
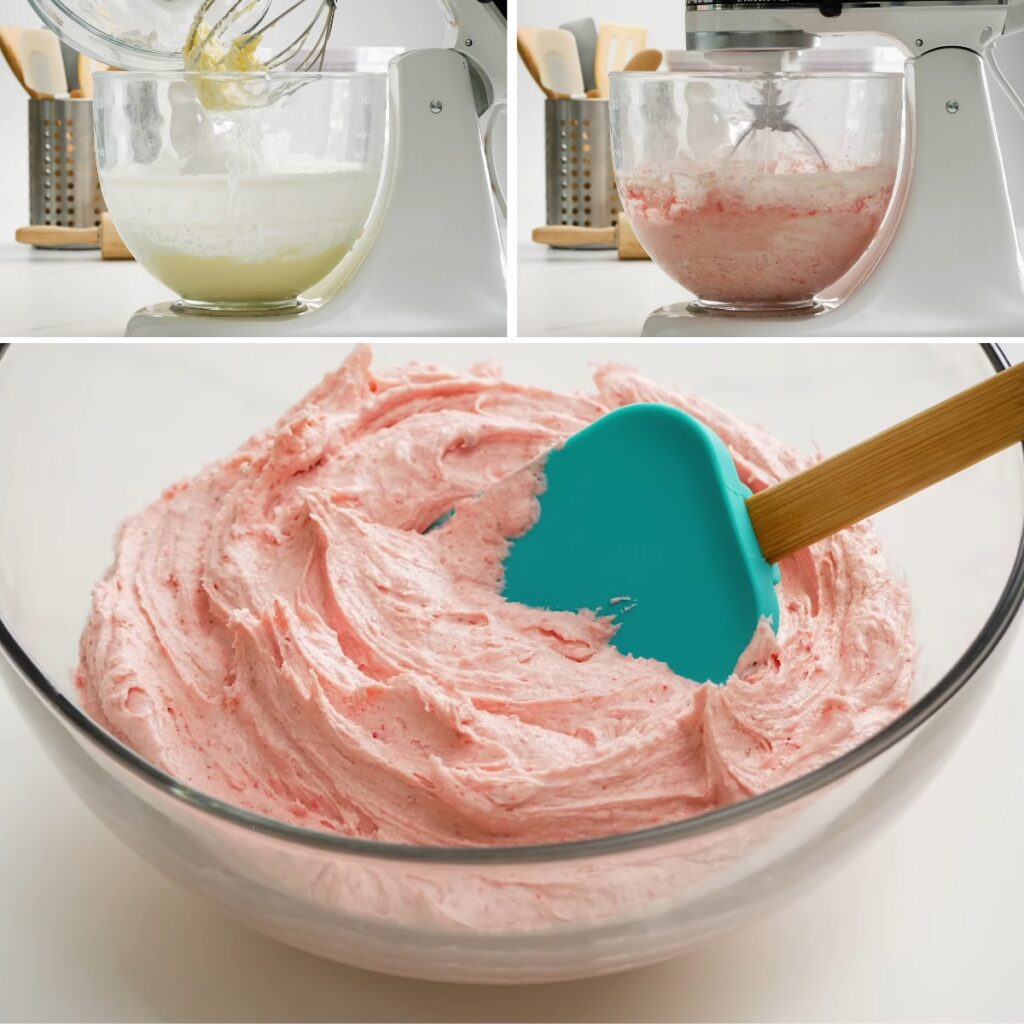
Step 3.
Now, let’s make your frosting truly sing.
Toss in a pinch of salt, a splash of vanilla extract, and your heavy whipping cream; whisk it all up until perfectly combined. Don’t forget to scrape down the bowl’s sides to make sure everything’s mixed in!
Chocolate-Coated Strawberries
Step 1.
Grab a big ol’ baking sheet and line it with some parchment paper; this way, our strawberries won’t stick to the tray later on. Set it aside for now – it’s ready to go when we are!
Step 2.
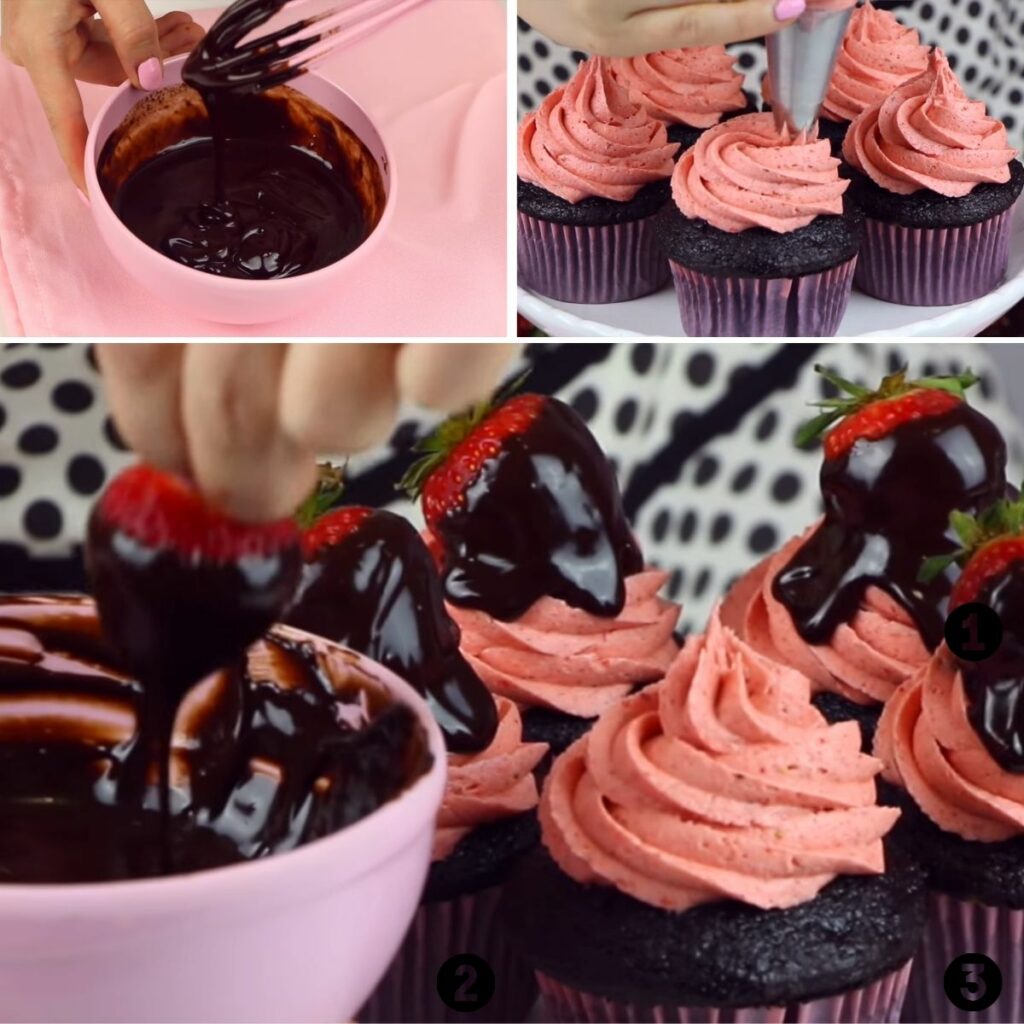
Now, break out the chocolate and chuck it into your microwave-safe bowl. Stick the bowl in the microwave and give it a blast for about 20 seconds. Take it out, give it a good stir, then pop it back in. Repeat until the chocolate’s all melted and silky smooth; no lumps allowed!
Step 3.
I bet you can’t wait to get your fresh strawberries dressed up!
Dip each of them into the luscious melted chocolate, one by one, making sure it’s coated all over. Then, plop them gently onto the baking sheet.
Once they all look fabulous in their chocolate coats, slide the whole tray into the fridge. Let them chill out until the chocolate’s all set and your strawberries are ready to steal the show!
Notes
1. On the hunt for freeze-dried strawberries? Your best bet is to swing by your neighborhood grocery store; they usually stock these fruits in their dried fruit aisles. And don’t mistake them for regular dried strawberries – they’re different!
2. Oh, speaking of cupcake storage 101: if you’ve got some cupcakes you want to keep fresh, pop them into airtight containers in the fridge. They should stay good for about 4 days.
And what if you’ve already whipped up some frosting? Then you can store that in the fridge, too, for about a week. Easy peasy!
3. Do your cupcakes sink in the oven? Don’t panic!
Sure, they might dip a bit in the middle while baking, but usually, they will bounce back once they’re done. And hey, even if they do sink a little, it’s not a big deal ’cause you can scoop out the centers to fill them up with cream anyway!
4. If the frosting is not quite hitting the mark, no worries; just tweak its consistency a bit.
When it’s too runny, I usually toss in some powdered sugar to thicken it up. But don’t go overboard with the sugar, or it’ll end up too sweet. Just a little extra should do the trick!
5. No buttermilk on hand? No problem! You can whip up your DIY version real quick.
Just grab a liquid measuring cup and add ¾ tablespoon of lemon juice or white vinegar to it. Then pour in enough whole milk until you hit that ¾ mark for the recipe.
Now, if you’re really in a hurry, you can use non-dairy or lower-fat milk – but just a heads up, the cupcakes might not turn out quite as rich or moist.
Give it all a good stir and let it chill for about 5 minutes. Your homemade “buttermilk” might look a bit funky, but that’s how you know it’s ready to rock!
6. Want to jazz up these cupcakes with some filling, like strawberry jam? Well, I’ve got an awesome method called the “cone” trick.
First off, grab yourself a paring knife. Gently cut out a circle at the cupcake’s very center, then angle the knife and slice halfway down.
Next, lift out the cone-shaped part from the middle. Trim off those pointy ends from the cone, so you’re left with a nice, flat “top” – these will be our cupcake lids later.
All that’s left to do is spoon in the filling and pop the flat top back on. Voila! You’ve got yourself a fancy-filled cupcake ready to wow everyone.
FAQs
My Cupcakes Are Dry/Dense. What Happened?
Ah, it sounds like you might’ve gone a bit overboard with the mixing! Next time, try being a bit gentler to keep that batter nice and moist.
How Can I Keep My Chocolate-Coated Strawberries From Sweating?
Don’t leave them out at room temp for too long. See, temperature changes can cause condensation, and that’s when the “sweating” happens! Oh, and make sure there’s some space between the berries in your container to keep moisture from building up.
There you have it. Good luck!
Discover More Unique Cupcake Recipes:

Chocolate Covered Strawberry Cupcakes
Ingredients
Cupcakes:
- 1 ½ cups all-purpose flour, leveled & spooned
- ½ cup + 3 tablespoons unsweetened cocoa powder
- 1 ¼ teaspoon baking powder
- ¾ teaspoon baking soda
- ¾ teaspoon salt
- ¾ cup lightly packed, light brown sugar
- ¾ cup granulated sugar
- ½ cup vegetable or canola oil
- ¾ cup buttermilk
- 2 large eggs
- 1 ½ teaspoons pure vanilla extract
- ¾ cup boiling water
- ¾ teaspoon instant espresso powder
Frosting:
- 1 ½ cups softened, unsalted butter at room temperature
- 4 ½ cups powdered sugar
- 1 ½ 1-ounce bags of freeze-dried strawberries
- 3-4 ½ tablespoons heavy whipping cream
- 1 ½ teaspoons pure vanilla extract
- ¼ teaspoon salt
Chocolate-coated strawberries:
- 24 medium-sized strawberries
- 6 ounces chopped, semisweet chocolate
Instructions
Chocolate cupcakes:
- Preheat your oven to 350°F (177°C) and line 24 cupcake liners in two muffin pans.
- Sift together dry ingredients in a mixing bowl, then add sugars, vanilla, buttermilk, egg, and oil. Mix until smooth.
- Dissolve instant espresso in boiling water, then add to the batter and mix.
- Spoon batter into liners and bake for 16 to 18 minutes until a toothpick comes out quite clean. Let them cool on the wire rack.
Frosting:
- Beat butter until smooth, then gradually add powdered sugar. Mix until creamy.
- Process freeze-dried strawberries into powder and mix them into the frosting.
- Add salt, vanilla, and heavy whipping cream. Whisk until combined and scrape down the bowl’s sides if necessary.
Chocolate-coated strawberries:
- Line your baking sheet with some parchment paper.
- Melt chocolate in a microwave-safe bowl, stirring every 20 seconds until smooth.
- Dip strawberries in melted chocolate and place on the baking sheet.
- Chill them in the fridge until the chocolate is all set.
Notes
- Freeze-dried strawberries are typically found in grocery store dried fruit aisles and differ from regular dried strawberries.
- To keep cupcakes fresh, store them in airtight containers in the fridge for up to 4 days. Frosting can also be stored in the fridge for about a week.
- Cupcakes sinking in the oven is normal; they often bounce back once baked. And even if they sink, you can still fill them with cream.
- Add powdered sugar if the frosting’s too runny, but be cautious not to make it overly sweet.
- Create a DIY buttermilk by adding lemon juice or vinegar to whole milk, then allow it to sit for 5 minutes. You can use non-dairy or lower-fat milk instead, but it may affect the richness and moisture of the cupcakes.
- When adding fillings (like strawberry jam), you should use the “cone” trick: cut out the center, fill with jam, and replace the top.

