Ever since I was a little kid, I’ve always found old-school red velvet cakes super cool. Can you believe they didn’t even need food coloring back then? The cocoa powder alone did all the magic!
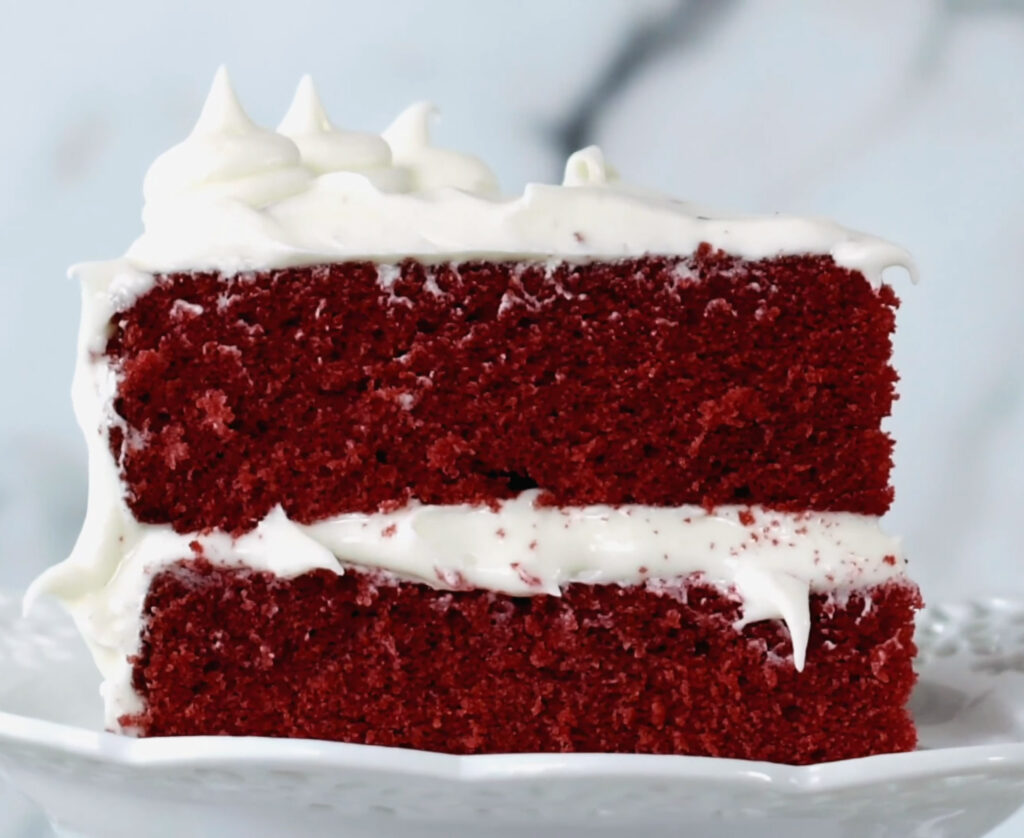
But times have changed, and cocoa powder isn’t quite the same today. Sooo, my simple red velvet cake recipe does call for a bit of food coloring. Doesn’t matter, btw; it still tastes heavenly.
Why We All Love Classic Red Velvet Cake Recipes

- That vibrant red color is an instant attention-grabber, isn’t it? It totally steals the show on any dessert spread! And unlike some cakes that are too sweet for their own good, red velvet has a classy, timeless vibe that’s perfect for all kinds of occasions — birthdays, anniversaries, even baby showers!
- And no worries — red velvet isn’t just a chocolate cake in disguise. There’s a subtle hint of cocoa wrapped in tangy buttermilk to create a whole new level of yum! And let’s not forget about the rich cream cheese frosting, our (literal) icing on the cake.
- Can we talk about the texture? I mean, it’s called velvet for a reason! Thanks to a little vinegar and buttermilk magic in the batter, this cake is seriously soft and just melts in your mouth with every bite. It’s pure heaven, I tell you!
- Red velvet cake is a huge star on its own. But what if you want to take it to the next level and send your taste buds into overdrive? Then add a scoop of vanilla ice cream or drizzle some chocolate ganache on top!
How To Make Red Velvet Cake
Here’s what we need for a killer red velvet cake!
- Cake Flour: Our star player. It’s lighter than regular flour and gives your cake a soft, melt-on-the-tongue texture you’d only find in fancy bakeries!
- Unsweetened Cocoa Powder: A little dash (3 tablespoons) should do. I honestly don’t want that cocoa flavor to overshadow the buttery and vanilla goodness.
- Oil & Butter: Let’s talk fats here! Butter brings a rich, buttery flavor (duh), and oil keeps things moist and tender. This duo is what makes your cake stand out.
- Buttermilk: The champ that adds a tangy kick and keeps the cake super moist. Plus, thanks to its magical chemistry with baking soda, my cake always rises to perfection!
How about the best part of all – the red color?
As I said, we’re using food coloring to coat the cake in a classic red velvet look. I often use gel food coloring because it’s very concentrated, and a little goes a long way.
But I know many of you prefer something more natural, so just stick to beet powder instead! And even if you’re not a huge fan of food coloring altogether, no worries. Your moist cake will still taste amazing, except with a lovely cocoa shade now instead of bold red.
Cake
Step 1.
Time to get baking!
First thing first, preheat your oven to 350°F (or 177°C). Then grab two 6-inch cake pans and give ’em a good grease. Line ’em with some parchment rounds and (yep, you guessed it) grease those too. With this little trick, your cakes will slide right out of the pans without a hitch!
Step 2.
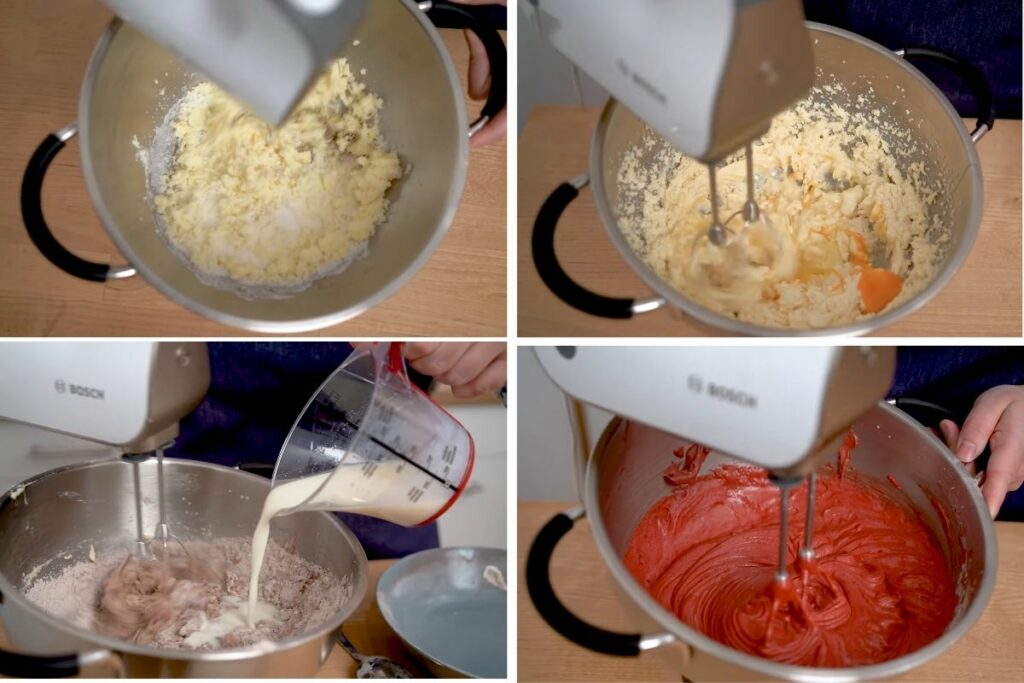
Now, onto the cake itself: in a big ol’ bowl, whisk together flour, cocoa powder, baking soda, and salt. Set that mixture aside for a sec.
Step 3.
Grab either a stand or handheld mixer with a paddle attachment. Toss in butter with sugar, then let ’em get mixed up at medium-high speed for about a minute until they’re all buddy-buddy. Don’t forget to scrape the bowl with your trusty rubber spatula.
Now, add the egg yolks, oil, vinegar, and vanilla extract, and crank up the speed to high for a solid 2 minutes. Keep scraping down the sides with your offset spatula to make sure all wet ingredients get in!
Step 4.
Time to bring in those dry ingredients we set aside in Step 2! Add ’em to the mixer in 2 to 3 batches, alternating with buttermilk, and mix until just combined.
Oh, and how can we forget about the food coloring? Add as much or as little as you like — I usually use about ⅔ to 1 ⅓ teaspoons of gel coloring.
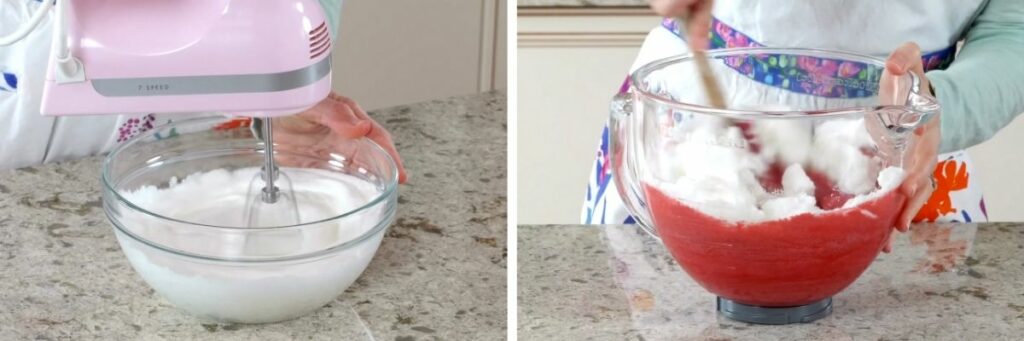
Step 5.
Now, let’s whip up the egg whites! Grab a clean bowl and beat them at high speed ’til peaky and fluffy (took me 3 minutes or so). Then, gently fold ’em into your cake batter. And there you have it: a silky, slightly thick batter ready to rock and roll.
Step 6.
Split your smooth batter evenly between the cake pans and pop everything in the oven. Bake ’em for about 30 to 32 minutes. You’ll know they’re done when you can touch the tops lightly and they bounce back or when a small toothpick poked into the middle comes out mostly clean!
What if the toothpick still has a few wet crumbs? The cakes might need to sit a bit longer in the oven, but keep an eye on them so they don’t dry out.
Step 7.
Once baked to golden perfection, take ’em out and let ’em chill in their pans on a rack. They must be cooled down COMPLETELY before we can move on to the fun part: the frosting recipe!
Frosting
Step 8.
Grab a big ol’ bowl and your mixer (stand or handheld mixer, your choice).
Beat the butter and cream cheese at medium-high until super smooth (usually takes me about 2 mins), then add some confectioner’s sugar, salt, and a bit of vanilla extract. Give it a whirl at lower speed for about half a min, then crank it up to high for at least 3 minutes or until it’s all perfectly combined.
Toss in some more sugar if it’s a bit too thin. If it’s too sweet, a little extra salt should do the trick. We want it soft yet not runny!
Step 9.
Finally, the part I like the most: frosting away!
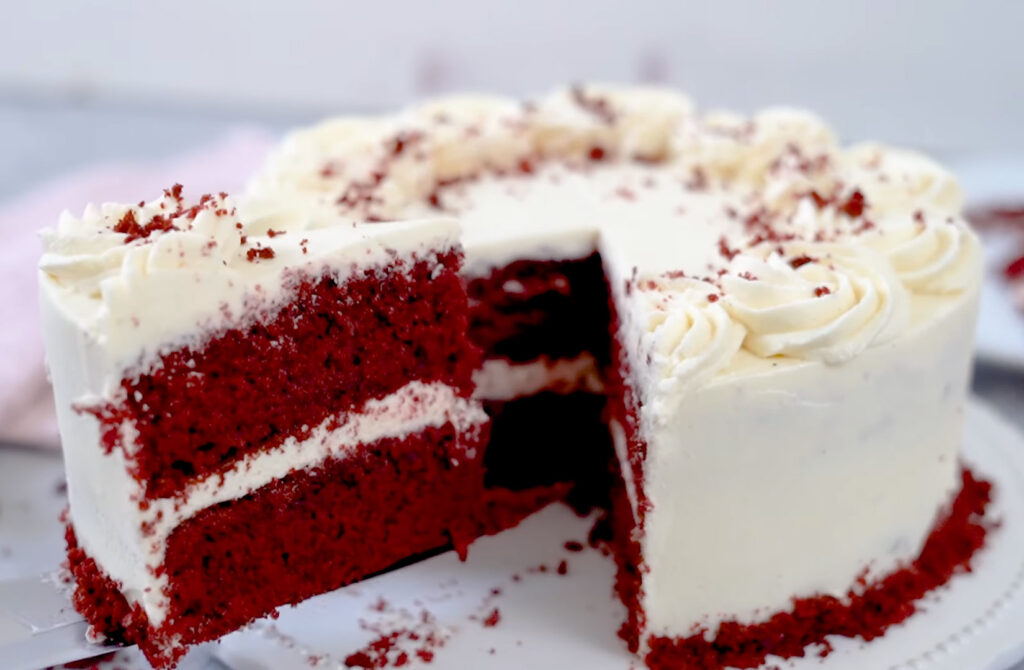
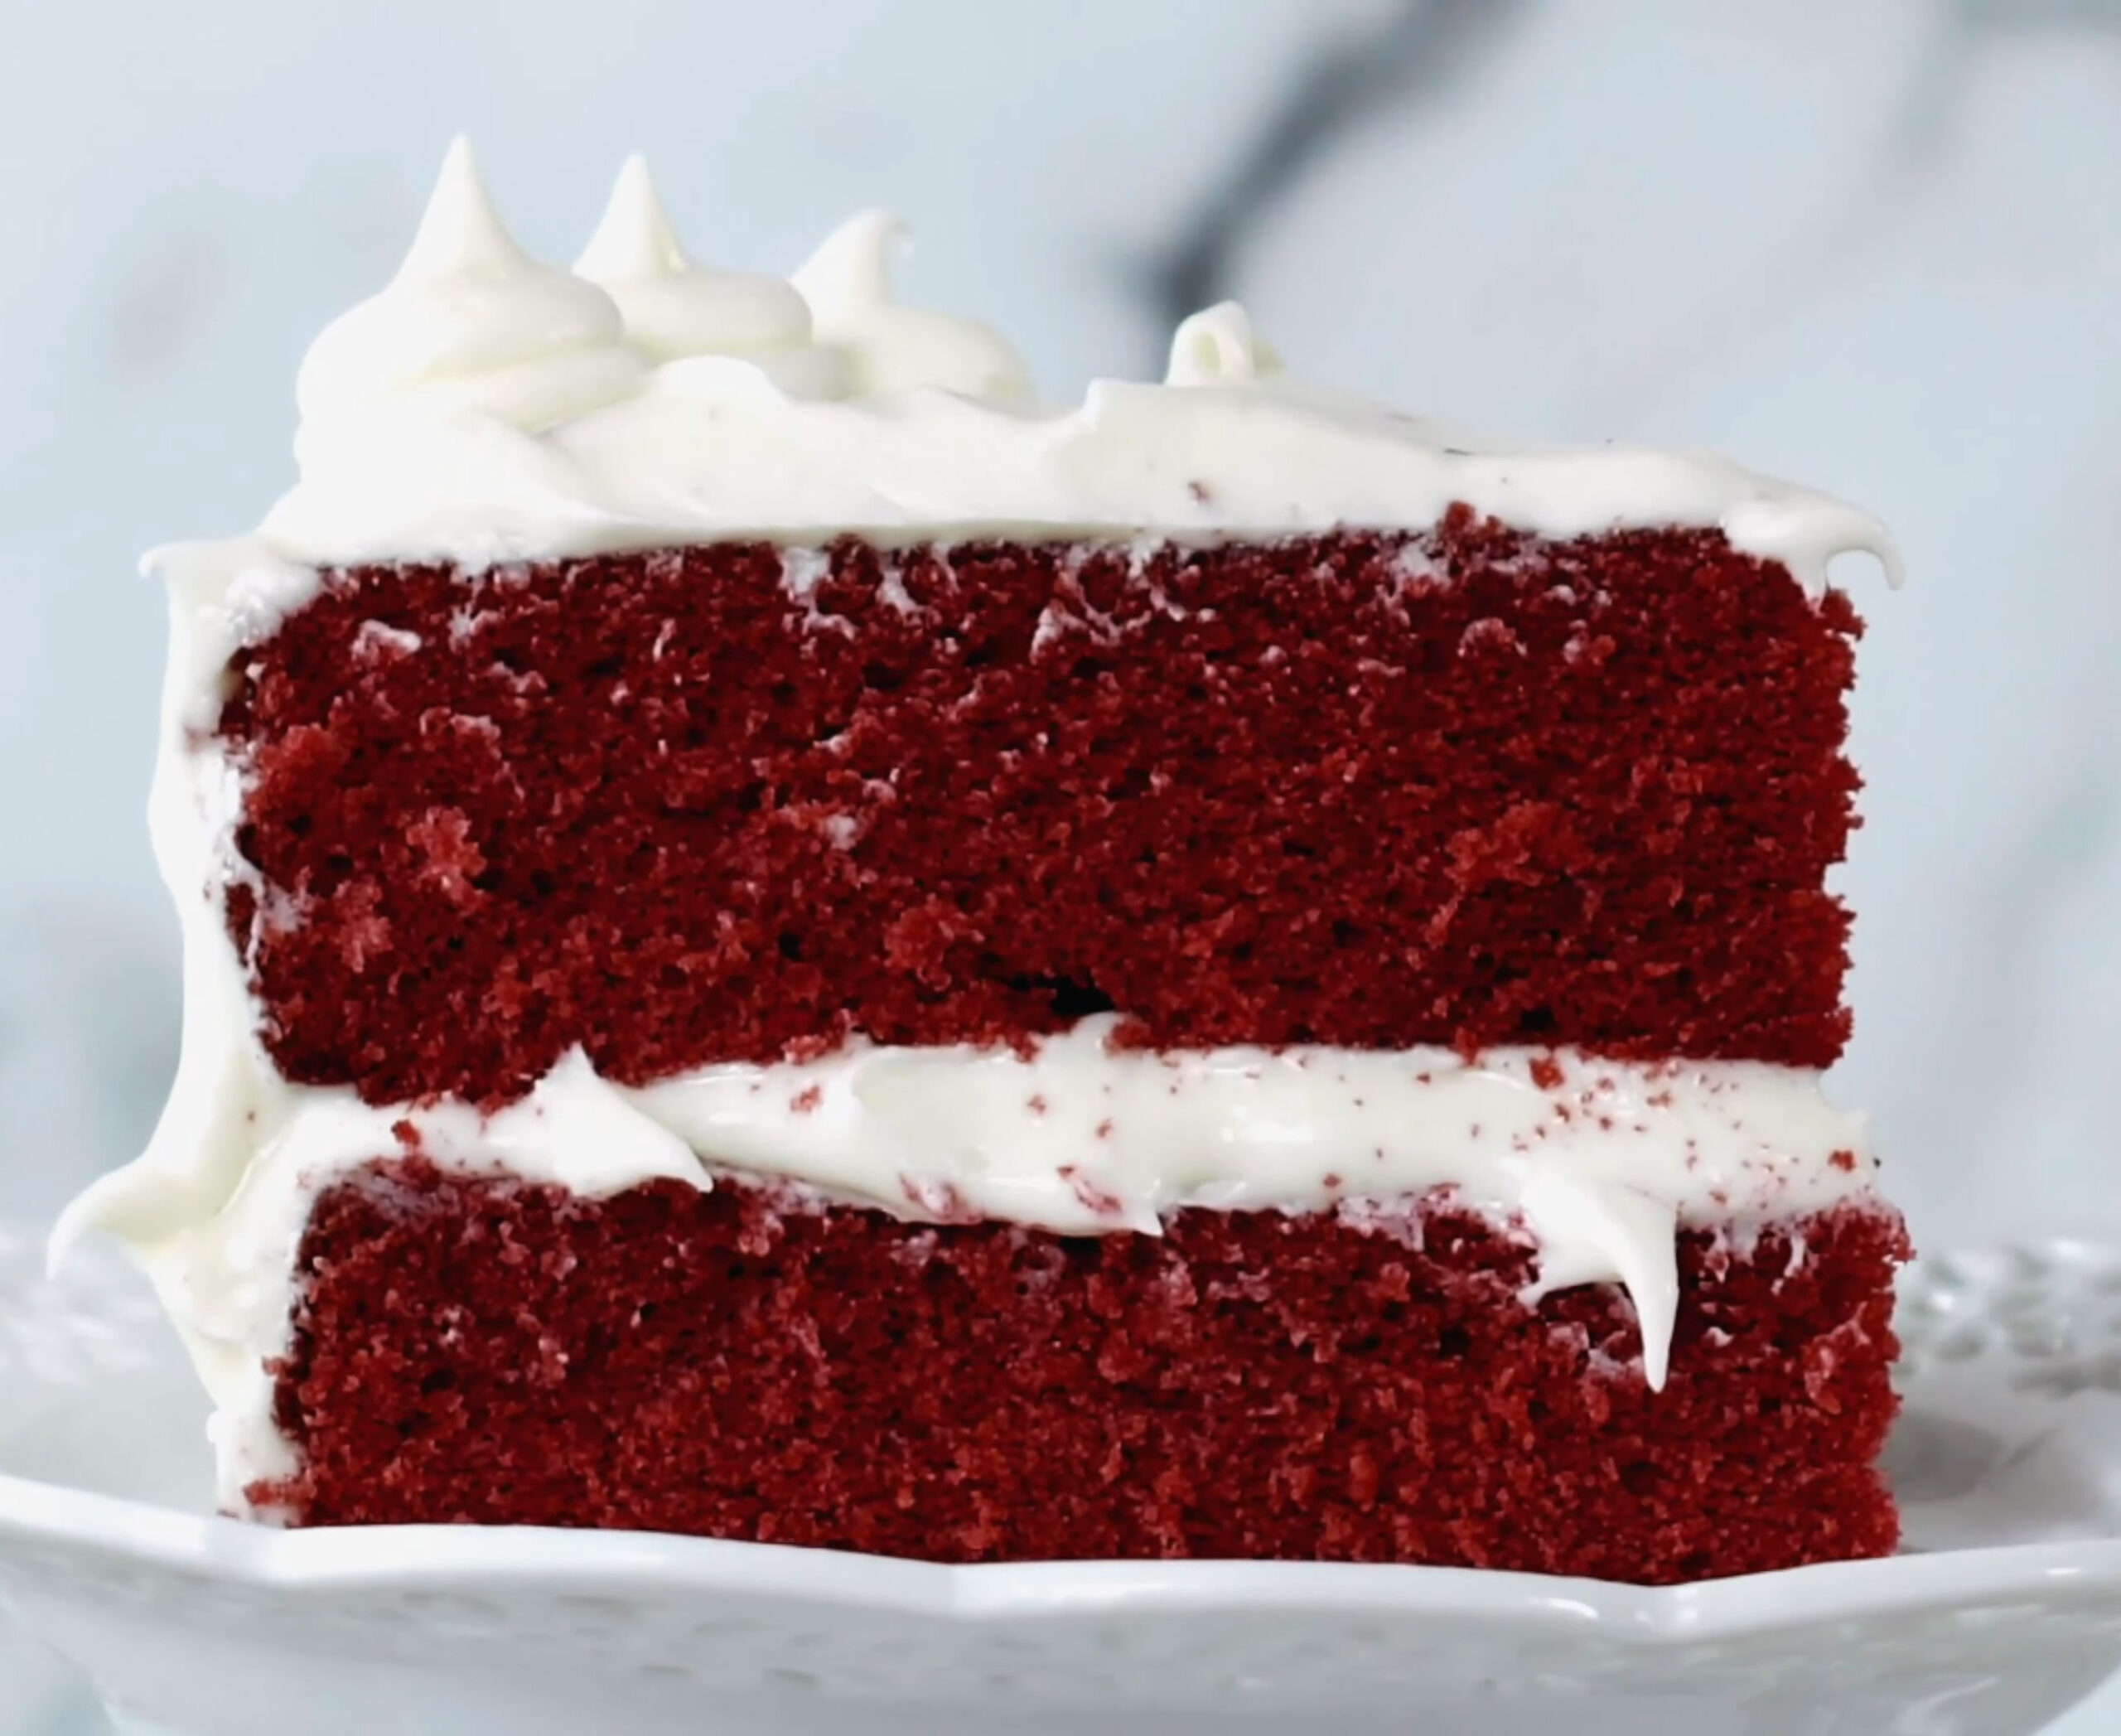
Use a serrated knife to level off the tops so they’re nice and flat. Place the first layer of your cake on a plate or stand, spread on some frosting, and then stack on the second. Coat the whole shebang with the rest of the creamy frosting — top, sides, all of it.
I like to use a good bench scraper and icing spatula for this job. And whenever I feel extra, I will break out a piping tip for some nice touches around the top!
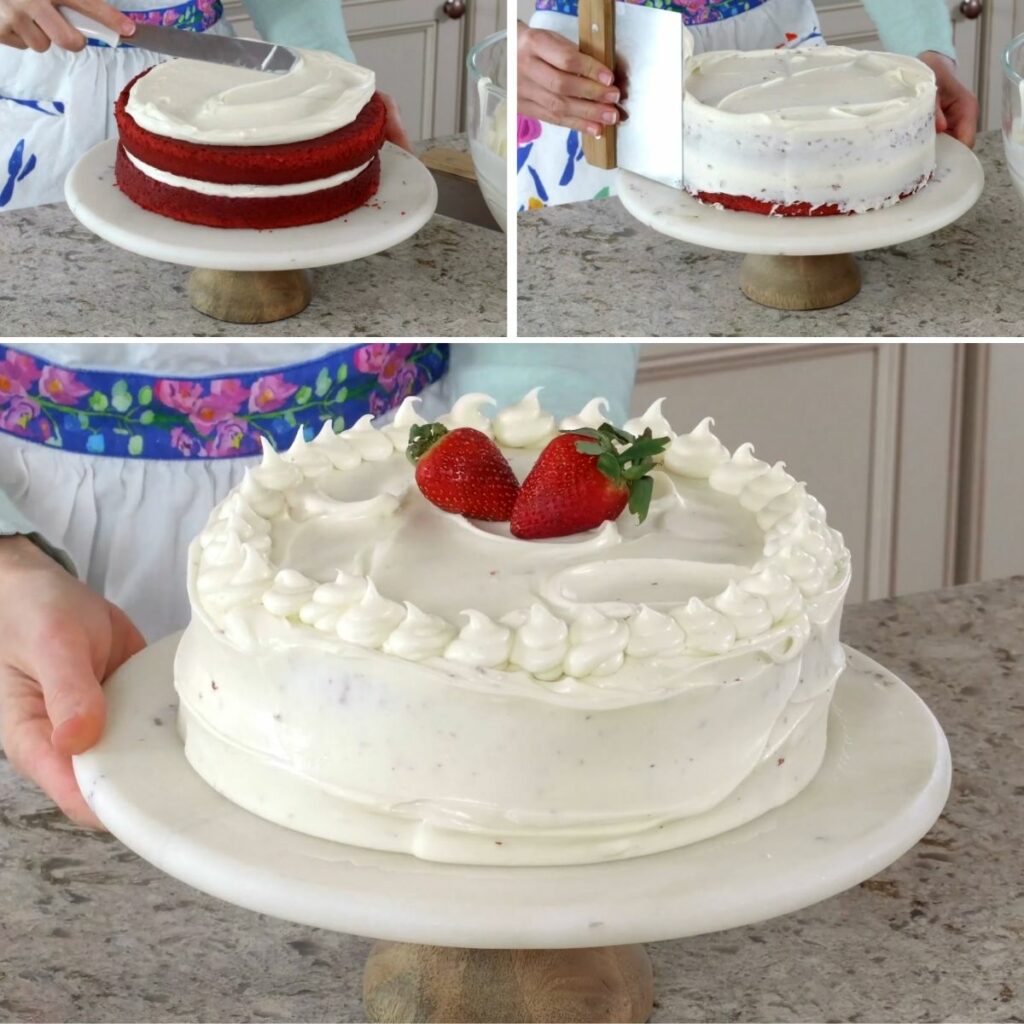
Step 10.
Alrighty, after all the hard work, it’s time to let our cake chill in the fridge for a bit. About 30 to 60 minutes should do the trick! This homemade red velvet cake will keep its shape nicely when we slice it up.
Notes
1. Cream cheese frosting is usually the go-to for red velvet cakes. But if you’re not vibing with its richness, I’ve got your back with something much lighter: buttercream! You can stick with classic vanilla, dive into chocolate-y heaven, or get wild with fruity twists like raspberry or strawberry.
For some braver souls, here are a couple more frosting ideas to tickle your taste buds:
- Ermine Frosting: The underdog of frostings, it’s lighter and less sugary than cream cheese but still super smooth and creamy. Perfect if you prefer a more subtle sweetness!
- Mascarpone Frosting: Think cream cheese frosting but with a twist! Mascarpone brings a slightly softer tang and just a hint of sweetness to the party. What a fun spin on the classic!
2. Have some unfrosted cake layers hanging around before D-day? Here’s what you do: wrap ’em up real snug in a few plastic wrap layers, then stash everything in an airtight container or freezer bag.
You’ve got two options from here: either leave these cakes at room temp for 4-5 days or let ’em sit in the freezer for 2 months.
When you’re finally ready to dig in, let ’em thaw in the refrigerator overnight; don’t ever think about thawing the entire cake at room temp unless you want a soggy, dripping mess on your hands!
Now, onto frosted cakes — grab yourself a cake keeper and cover ’em at room temp for about 6 hours. After that, pop ’em in the fridge for 3 days so their taste can stay as fresh as ever!
FAQs
My Red Velvet Cake Batter Is Too Thin. Is It Ruined?
Not necessarily! The red velvet cake batter is naturally thinner than some others. Still, if it’s too runny, try adding a tablespoon or two of extra flour to thicken it up a bit.
Can I Substitute Buttermilk In My Red Velvet Cake Recipe?
If you are really, REALLY in a pinch, try my DIY buttermilk! Combine 1 tablespoon of white vinegar or lemon juice with 1 cup of milk. Let it sit for 5 minutes, then use this buttermilk substitute in my red velvet cake recipe as usual.
Good luck with my easy red velvet cake recipe!
Discover More Unique Cake Recipes:


Moist Red Velvet Cake
Ingredients
Cake
- 2 cups spooned and leveled cake flour
- ⅔ teaspoon baking soda
- 1 ⅓ tablespoons natural cocoa powder
- ⅓ teaspoon salt
- ⅓ cup (6 tbsp) softened, unsalted butter, room temperature
- 1 ⅓ cups granulated sugar
- ⅔ cup vegetable or canola oil
- 3 large eggs room temperature
- ⅔ tablespoon pure vanilla extract
- ⅔ teaspoon distilled white vinegar
- gel or liquid coloring (red)
- ⅔ cup buttermilk (room temperature)
Frosting
- 11 ounces full-fat (softened brick cream cheese, room temperature)
- ½ cup (8 tbsp) softened, unsalted butter, room temperature
- 3 ⅓ cups confectioners’ sugar
- 1 teaspoon vanilla extract
- pinch of salt to taste
Instructions
Cake:
- Preheat your oven to 350°F (177°C) and prepare two 6-inch cake pans.
- Whisk together flour, cocoa powder, baking soda, and salt in a medium bowl.
- Mix butter and sugar in another bowl at medium speed, then add egg yolks, oil, vinegar, and vanilla extract and beat at high speed.
- Alternate adding dry ingredients (from Step 2) and buttermilk to the mixer, then mix in ⅔ to 1 ⅓ teaspoons of gel/liquid food coloring.
- Whip egg whites at high speed ’til fluffy and fold into batter.
- Divide the batter between baking pans and bake for 30 to 32 minutes.
- Cool cakes completely in pans on wire racks.
Frosting:
- Beat butter and cream cheese at medium-high speed until smooth, then toss in the confectioner’s sugar, salt, and vanilla extract. Beat at a lower speed for 30 secs and crank up to high for 3 mins.
- Level the cake’s top, then frost and stack each layer one by one.
- Before serving, refrigerate the cold cake for 30 to 60 minutes.
Notes
- Cream cheese frosting is popular, but buttercream offers a lighter taste with options like vanilla, chocolate, raspberry, or almond flavors.
- Other frosting ideas are Ermine(lighter and less sugary than cream cheese) and Mascarpone (adding a softer tang and slight sweetness).
- To store unfrosted cake layers, wrap them tightly in plastic wrap and store them in an airtight container or freezer bag. They can be kept at room temp for 4-5 days or frozen for 2 months.
- Remember to thaw unfrosted layers in the refrigerator overnight before serving. Don’t thaw them at room temp.
- Frosted cakes should be stored in your cake keeper at room temperature for 6 hours and then refrigerated for 3 days.